Make Your Home Smarter, One Step at a Time

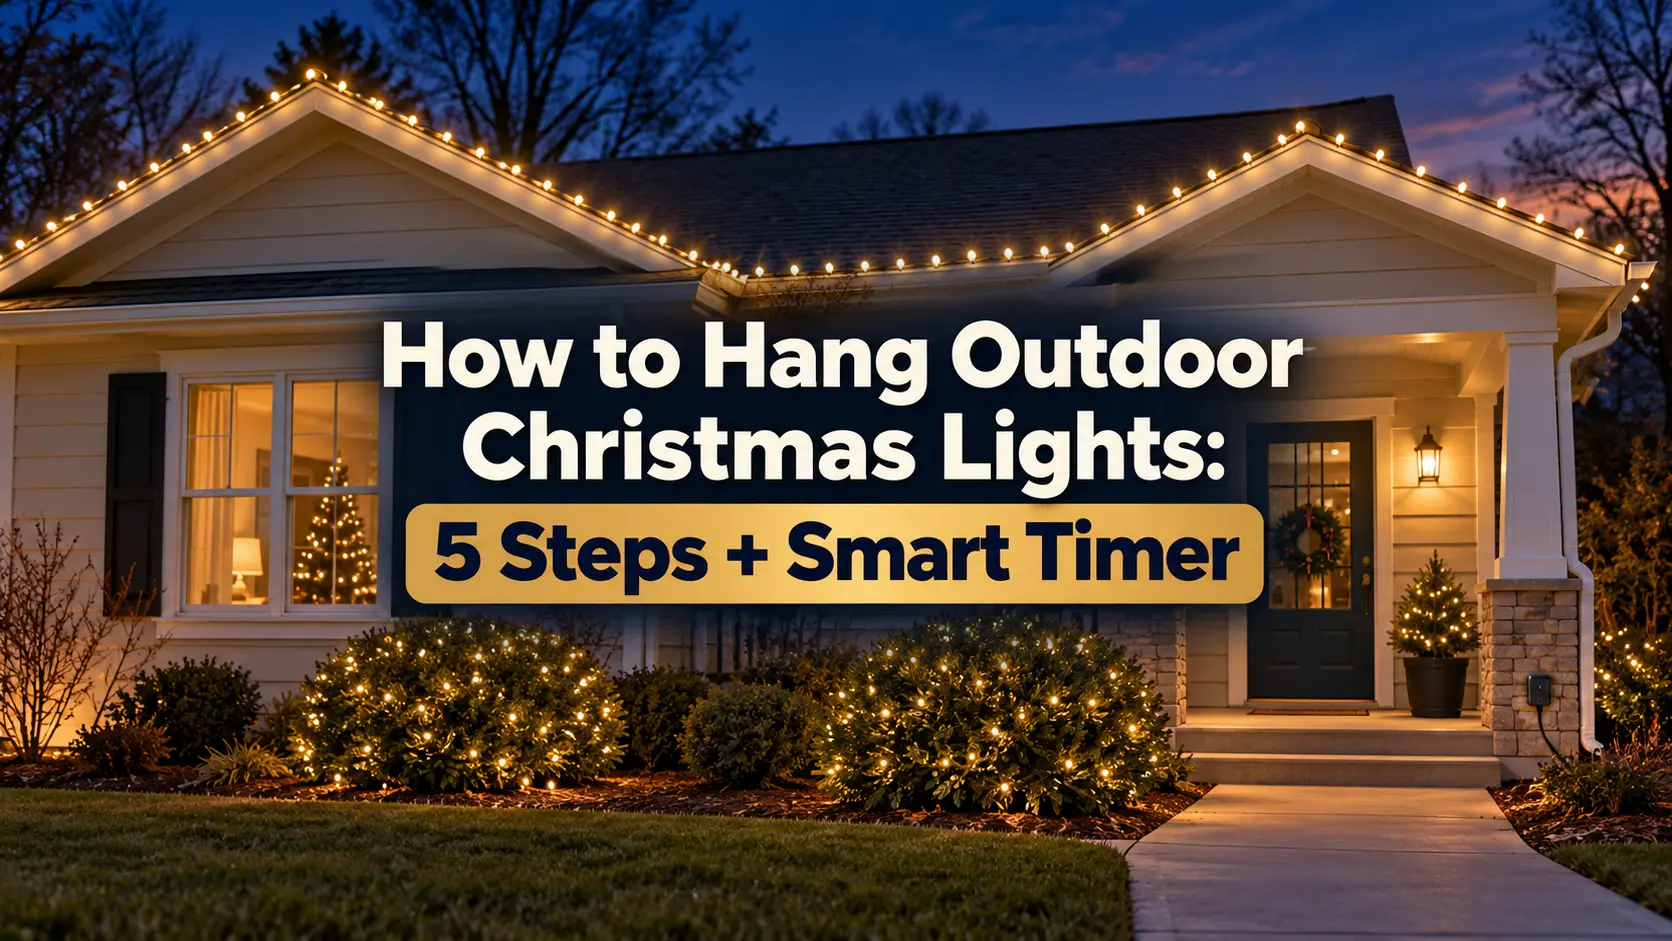
A string of lights can work perfectly on the garage floor and still fail forty feet along a roofline. The usual causes are dull ones: a loose bulb, a tired connector, a plug that sat in a puddle. The expensive part is finding out after every clip is already in place.
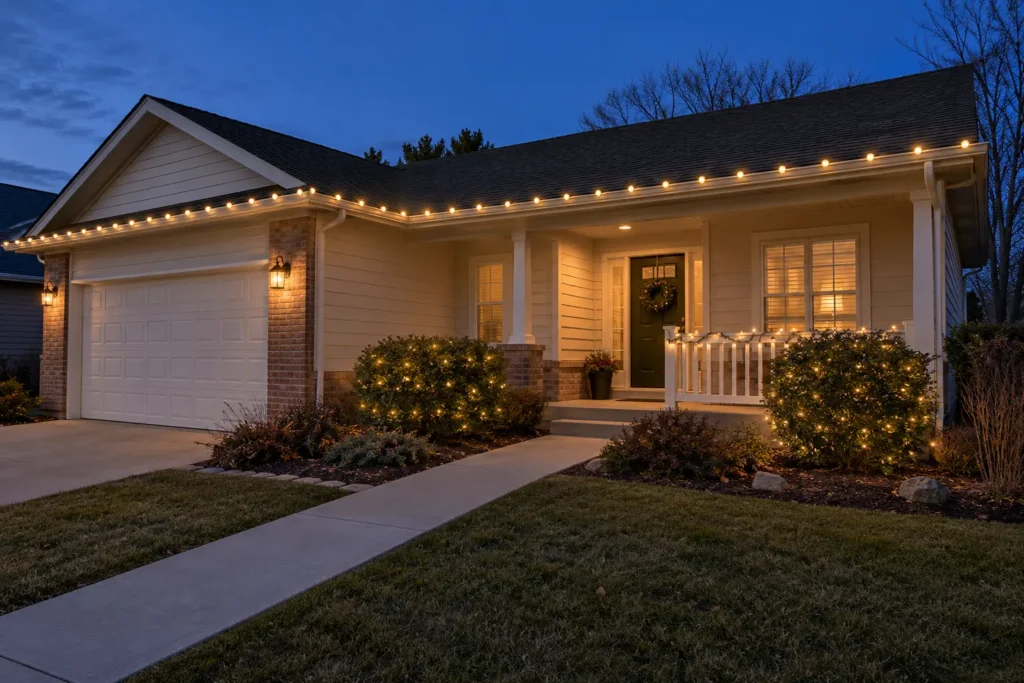
This guide is built around avoiding that moment. You will measure first, test each string while it is still within arm’s reach, hang it with hardware made for the surface, protect the power connections, and then hand the nightly switching to a timer or smart plug. Do the work in that order and hanging outdoor Christmas lights becomes a planned project instead of a nightly chore.
Quick answer
Settings saved.
Measure each run, allow for bends and slack, and test your outdoor-rated lights on the ground. Disconnect power before hanging them with clips suited to the surface. Plug an outdoor-rated timer or smart plug into a GFCI-protected outdoor outlet, then connect compatible lights and cords within every stated limit. Set a shutoff before bed and turn the display off when you leave home.
This guide focuses on U.S. plug-in seasonal displays on accessible gutters, porches and shrubs. If you rent, get permission before attaching hardware. High rooflines, outlet changes and damaged wiring call for qualified help.
Table of Contents
What You Need Before You Start
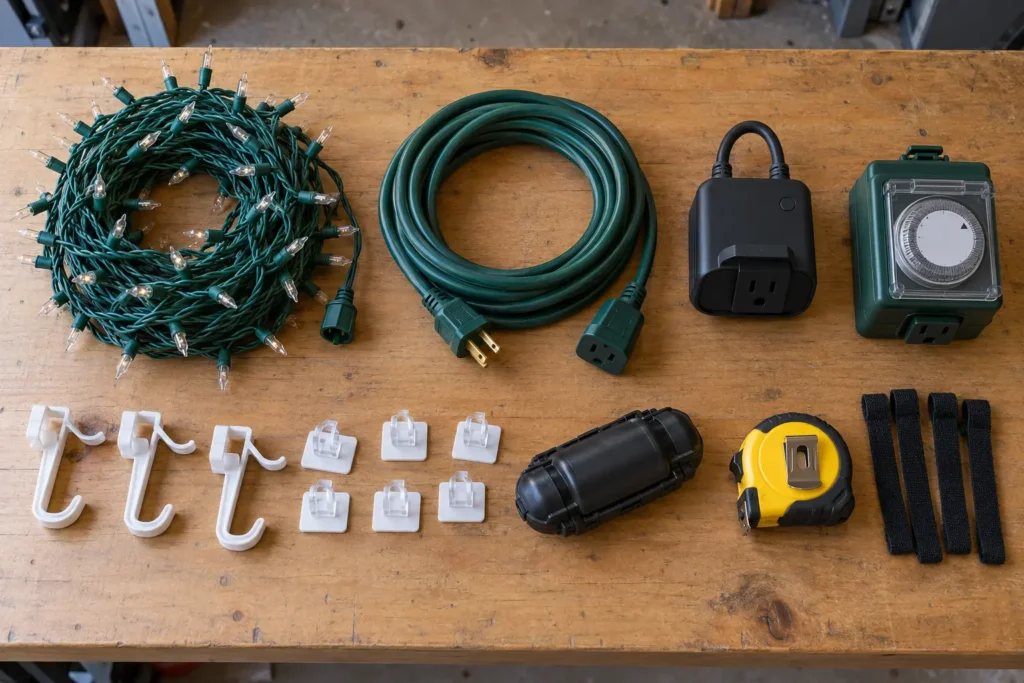
Most delays on installation day come from a missing small item, not a missing big one. Start with this kit:
- Outdoor-rated light strings. The rating should be printed on the box. A set without one should be treated as indoor-only.
- Clips matched to each surface. Gutters, shingles, siding and soil call for different fasteners, and one clip type rarely covers a whole house.
- Outdoor-rated extension cords. The markings on the jacket tell you what the cord is built for. “SJTW,” for example, indicates a jacket intended for weather exposure, and a label such as 16/3 gives the wire gauge and the number of conductors.
- An outdoor-rated smart plug or timer. The two are compared in the automation section below.
- A measuring tape and compatible spares. If your set has replaceable bulbs or fuses, use only the replacements specified by its manufacturer. Some LED sets have sealed bulbs.
- Suitable access equipment and connection protection. Choose a compatible hanging pole or an appropriate ladder, and covers intended for your outdoor connections.
How to Measure and Plan Your Layout
Before buying anything, measure every run you intend to light: the roofline, window frames, shrubs, the porch, the walkway. Write each length down separately. Use about 10% extra as a starting allowance for bends and slack, then check the actual route. It is a planning buffer, not a guarantee of fit. Measure the unlit route to the outlet separately; a string that stops a few inches short can’t be stretched to fit.
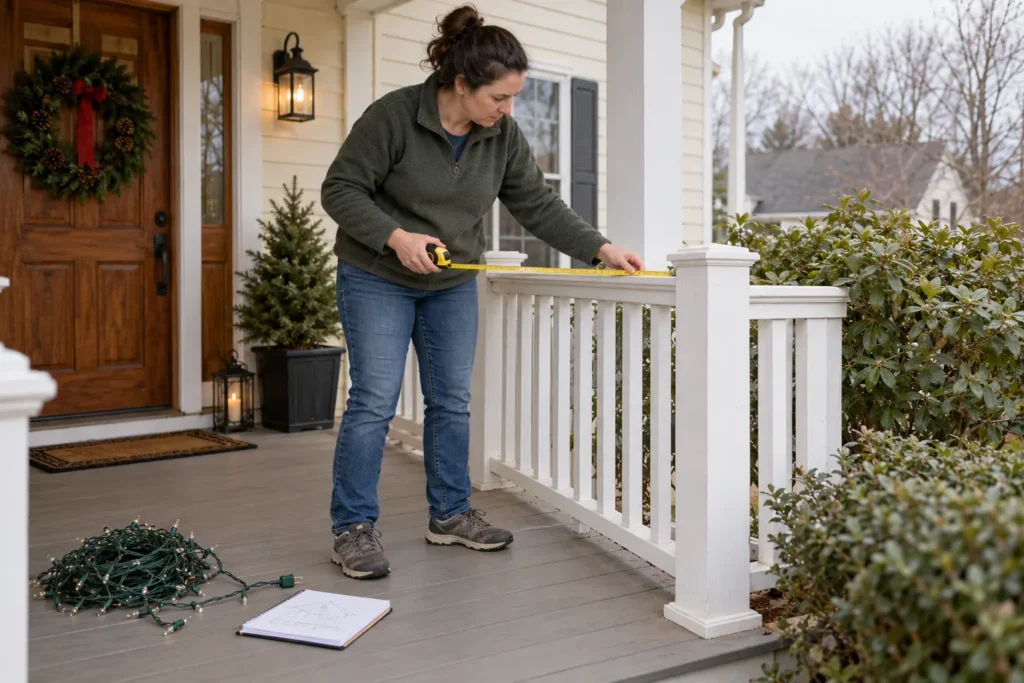
Next, mark every outdoor outlet on a rough sketch of the house and draw a line from each run to the closest one. Gaps between a run and its outlet are where extension cords come in, and it is far easier to count those on paper than to discover them on the ladder.
Here is a simple example with invented numbers, only to show the arithmetic. A 30-foot roofline becomes 33 feet with the buffer. Two shrubs that each need about 10 feet become 11 feet apiece. That gives 55 feet as a planning allowance, before choosing available string lengths and adding cord for the distance from each run to its outlet.
| Run | Measured | With about 10% added |
|---|---|---|
| Roofline | 30 ft | 33 ft |
| Shrub 1 | 10 ft | 11 ft |
| Shrub 2 | 10 ft | 11 ft |
| Planning allowance | 50 ft | 55 ft |
Check illuminated length before buying
Packaging may list both total length and illuminated length. The unlit lead cable counts toward total length but does not fill a gap in your roofline display. In the example above, two connectable sets with 20 feet of illuminated length each would provide 40 feet for the roofline, if their instructions permit linking. That leaves extra length to place deliberately; do not cut a standard string to fit.
Plan each run separately rather than buying only against the 55-foot total. Shrubs and rooflines may need different light types, and connector gaps affect the finished look.
Choose the look before you hang anything
For a simple first display, pick one main feature: the porch, front shrubs or a reachable roofline. Test your strings together at dusk to see whether the color and brightness match. Two boxes labeled “warm white” can still look different beside each other. A smaller, consistent display is easier to plan and maintain.
Step-by-Step: How to Hang Outdoor Christmas Lights
Test every string before it goes up
Plug each string in on the ground before you climb anything. A dead section or a flickering bulb is easier to investigate there. Set aside damaged cords and cracked sockets rather than trying to hide the damage with tape.
A single test is not quite enough, though. Strings that will share a run should also be connected and tested together, because a faulty joint between two sets only shows up when they are linked. Then test once more after hanging, before the ladder goes away. Three checks sound like a lot, but each one catches a different kind of fault. Disconnect power after testing and before hanging, adjusting, or replacing any component.
Rooflines and gutters
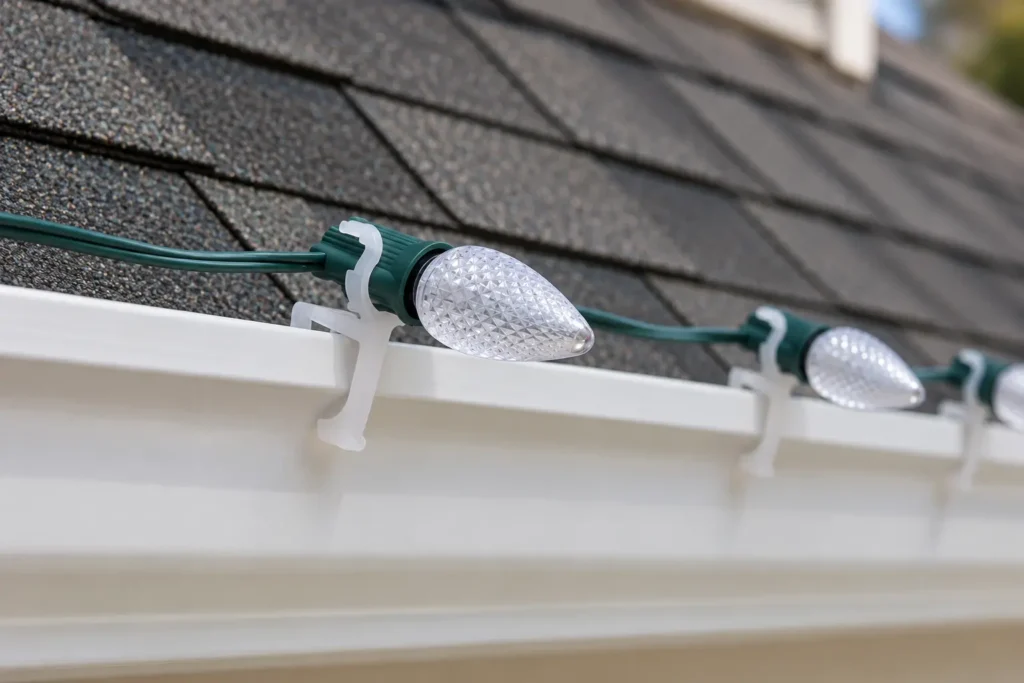
Begin at the end nearest your power source and work outward, so the supply plug never ends up on the far side of the house. Keep the lights unplugged while you work. The clip has to match the surface: gutter clips hook over the lip, shingle clips are made for the edge of asphalt shingles, and adhesive outdoor clips suit smooth trim.
Follow the clip maker’s spacing and load instructions, then space the clips evenly, and step back to the sidewalk now and then to judge how the line looks from where visitors will see it. Move the ladder rather than stretching toward the next clip, and keep your body between the side rails.
If you have a single-story roofline within reach, an extendable pole with a hook head can place lights from the ground. It won’t suit every roof shape, but on low, accessible edges it cuts down the climbing.
| Surface | What to look for | Check before use |
|---|---|---|
| Gutter edge | Compatible gutter light clips | Fit for the gutter profile and light type |
| Shingle edge | Clips explicitly approved for that roofing material | Roofing instructions; avoid lifting or damaging shingles |
| Smooth trim | Outdoor adhesive light clips | Approved finish, application temperature and curing time |
| Railing or porch post | Suitable clips or soft ties | No crushed cable or tight bends |
| Path border | Light stakes made for your set | Keep cables away from walking routes |
Trees and shrubs
On shrubs, wrap loosely from the bottom upward and weave the string through the branches rather than pulling it tight against them. Branches move in wind, so a string with a little slack is less likely to be strained. On taller trees, a pole with a hook lets you place the upper loops without climbing.
Walkways, railings, and porches
Railings accept clips or soft ties, and porch posts can be wrapped in a loose spiral. Along walkways, use stakes to lift the string off the ground and tuck cord against borders so it doesn’t cross the path where someone might trip on it after dark.
Windows and trim belong in this group as well. Smooth, finished surfaces can take adhesive outdoor clips, which avoids drilling into frames. They hold best on clean, compatible surfaces and are no substitute for roofline hardware. Wooden pergolas, fences and similar structures can take screw-in hooks, provided the surface is suitable for them.
Power and cord routing
Give each run the shortest practical path to a protected outdoor outlet, and use only outdoor-rated cords for the outdoor stretch. Keep plugs and cord joints off the ground, and never let a cord be pinched by a closed door or window.
Plan controller connections only after checking the combined load. Two sockets on a smart plug may share one total rating, and two wall outlets may share a circuit. Avoid stacking adapters or using indoor power strips outside.
Outdoor Lighting Safety Basics
The numbers that matter for safety live on the products themselves, so read them rather than relying on memory or a rule of thumb from a forum.
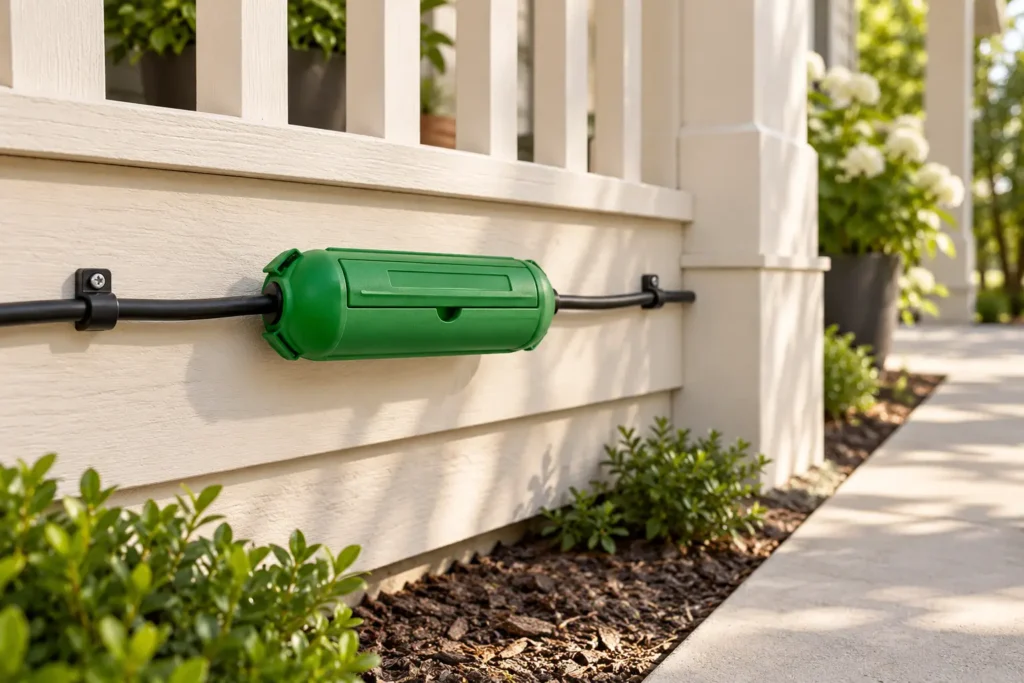
Connection limits. Every light set states how many sets can be connected end to end. Cords, power strips, timers and outlets all carry ratings of their own. The system as a whole is limited by whichever rating is lowest.
GFCI protection. A ground-fault circuit interrupter cuts power quickly when current leaks to ground, which is the situation you worry about with wet outdoor connections. Many newer homes have GFCI-protected outdoor outlets, while older ones may not. Follow the device’s test instructions, or ask an electrician if you are unsure where the protection is provided. A suitable portable outdoor GFCI is another option; it does not repair a faulty outlet.
Dry, raised connections. Keep plugs and cord joints off the ground and out of standing water, snow melt and places where rain pools. Purpose-made covers help, but they have limits: a cover that shields a connection from rain is not a sealed enclosure and is not meant to sit in a flooded area.
Damaged equipment. Cracked insulation, exposed wire or a bent plug is a reason to replace the set. Wrapping it in tape only hides the problem.
Ladder safety. Set the ladder on firm, level ground, keep your weight centered, and have someone steady it if possible. Skip the job in wet or gusty weather, and keep well clear of overhead power lines.
The U.S. Consumer Product Safety Commission’s holiday guidance supports outdoor-rated equipment, GFCI protection and switching lights off before bed or leaving home. Choose lights bearing a recognized testing laboratory’s certification mark.
Automate Your Outdoor Christmas Lights With a Timer or Smart Plug
Automation is what separates a display you maintain every evening from one you set up once. Both of the devices below sit between the outlet and your lights and decide when power flows.
Timer vs. smart plug, and which one fits you
A conventional plug-in timer is a self-contained device. You set on and off times at the unit, and it needs no Wi-Fi and no app. A Wi-Fi smart plug connects to your home network, which opens up app control, voice commands and more flexible schedules, but it needs a usable signal at the outlet. If the outdoor outlet is out of range of your router, a timer is the simpler path.
| If this describes you | Likely better fit |
|---|---|
| Weak or no Wi-Fi at the outdoor outlet | Outdoor timer |
| You only need on at a set time and off at a set time | Outdoor timer |
| You want to change schedules from your phone | Outdoor smart plug |
| You already use voice assistants or smart home routines | Outdoor smart plug |
Whichever you choose, confirm that it is rated for outdoor use and that its maximum load is higher than the total draw of what you plug into it. The load rating is on the device or its listing.
Schedules, sunset triggers, and voice control
Sunset moves through the season, so a fixed turn-on time will be too early in some weeks and too late in others. Some smart plugs can tie a schedule to sunset, and some timers are built around dusk-to-dawn operation. Not every model offers this, so check the listing first. Voice control likewise depends on the plug supporting your assistant. Pair the on trigger with a shutoff you choose, such as bedtime.
Running costs depend on your display and are easy to estimate. Multiply the display’s total watts by the hours it runs each night, divide by 1,000 to get kilowatt-hours, then multiply by your electricity rate. As a purely hypothetical case, 50 watts running 6 hours is 0.3 kWh, which at 16 cents per kWh comes to about 5 cents a night. The wattage is printed on the packaging and the rate is on your utility bill. LED sets generally draw less than incandescent ones, which is a large part of why they are the usual outdoor choice.
How to set a sunset schedule in the Kasa app
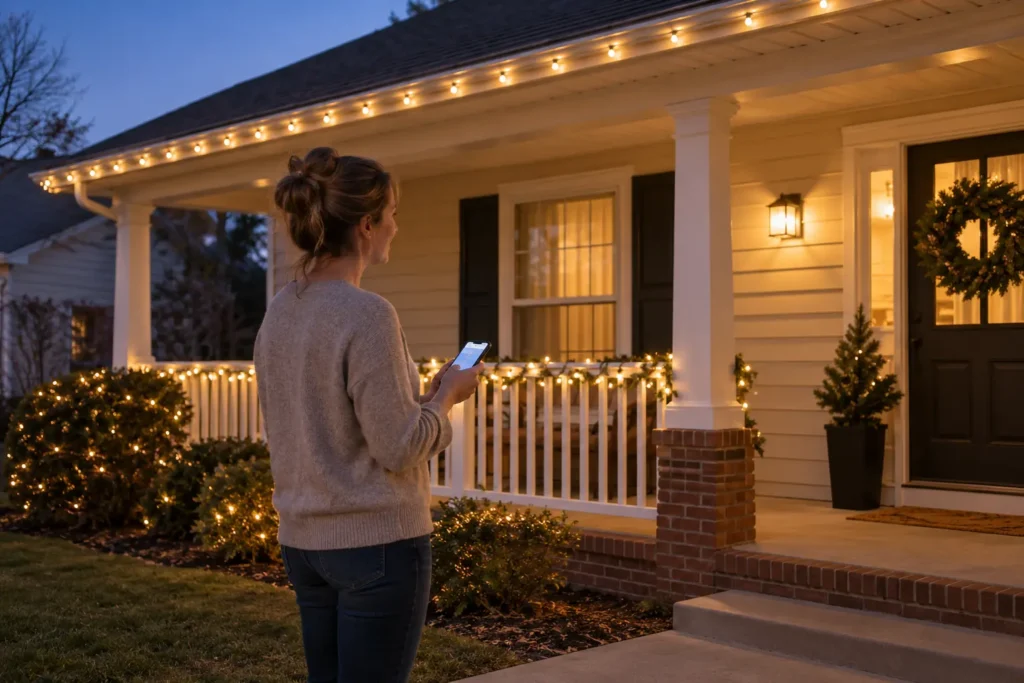
The Kasa EP40 from the original shortlist is one documented example. Its manufacturer support page provides the model-specific guide; this is a documentation-based example, not a hands-on test. Use the instructions for your exact hardware version.
- Complete pairing, then confirm that the app has the correct location and time settings.
- Select the outlet controlling your display and open Schedule.
- Add an On event at Sunset and choose the repeat days.
- Create a separate Off event before your bedtime. Schedule both outlets if both are in use.
- Save the events and confirm they are enabled. Test the outlet response with a temporary near-term event, then remove that test and check your intended schedule.
Menu labels can change. TP-Link’s Kasa scheduling instructions explain the available time triggers. Check the first evening’s operation, and switch the display off manually if you leave home before its scheduled shutoff.
Using a timer without Wi-Fi
For a conventional timer, set the current clock, choose your on/off events and select automatic mode. Check AM/PM and repeat days. A photocell timer uses ambient light instead of a fixed switch-on time; place its sensor as instructed so nearby lighting does not confuse it. Features and power-loss behavior vary by model.
What a smart plug can and cannot control
A basic on/off plug switches power; it does not add dimming or color effects to ordinary string lights. If your lights have a separate controller, test whether they restart in the desired mode after power is restored. Check the plug’s instructions for offline schedules and power-loss behavior, and keep a usable manual control.
Scenes and the wider smart home
If you are also planning permanent indoor lighting controls, our smart light switch buying guide explains wiring and ecosystem considerations.
Once the lights are on a smart plug, they can sit alongside your other lighting in routines and scenes. Our Smart Home Lighting Control System guide covers how scenes are built, and Best Smart Home Ecosystem 2026 explains how to choose the platform your plug should be compatible with.
Accessories to Choose for Your Outdoor Christmas Lights
Light strings vary too much by house and taste for one recommendation. The accessories are where a short list helps, because they decide whether the install is easy, protected and automated.
These are buying criteria, not physically tested product rankings. Use manufacturer instructions for the exact model you buy. Prices and retailer star ratings are omitted because they change and do not establish suitability for your home.
- Surface-compatible light clips: check your bulb size, cable and mounting surface together. “Universal” does not mean every gutter, shingle or trim finish.
- A compatible hanging pole: useful for accessible edges if the head fits your clips. Check usable reach from the ground rather than assuming pole length equals installation height.
- Outdoor extension cords: choose the length and load rating for the actual route. A longer cord is not automatically suitable for the same load; follow its label and instructions.
- An outdoor timer or Wi-Fi plug: choose a timer for simple local control, or a smart plug for supported app routines. The EP40 example above shows one scheduling workflow; verify compatibility before purchase.
- Outdoor connection covers: match the cover to the plugs and cord sizes. Follow its orientation and exposure limits; do not assume that a covered joint can sit in water.
If the wall outlet needs a different in-use cover, check the receptacle and enclosure requirements with an electrician. A cord-joint cover and an outlet cover serve different jobs.
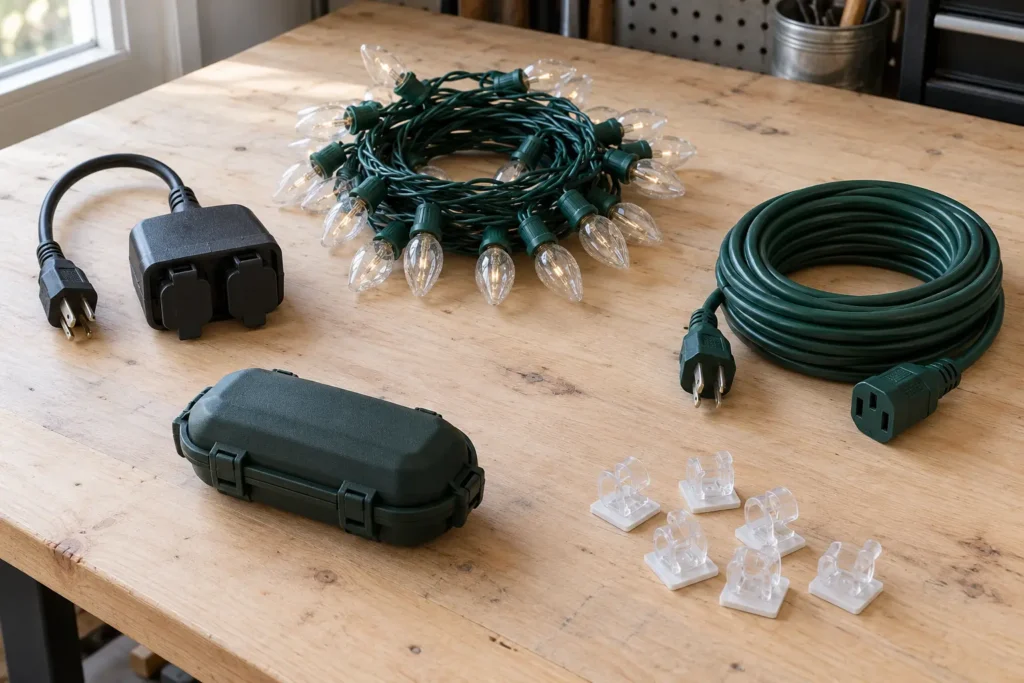
TechNestDecor Picks: Outdoor Christmas Lighting Essentials.
Best Adhesive Clips for Smooth Trim

Command Outdoor Light Clips – 20 Clips, 24 Weather-Resistant Strips

Damage-free adhesive clips for hanging lights on smooth, finished surfaces without nails, screws or drilling.
- Water- and UV-resistant adhesive strips
- For doors, flat vinyl siding, soffits, finished fences and windows
- Rated for 15°F to 125°F
- One clip recommended for every 2 feet of lights
- Wait one hour after applying before hanging lights
Best for: Doors, windows, soffits and other smooth, clean surfaces where you don’t want to drill.
Our verdict: Handy for trim and windows, but not for rough surfaces such as brick, cement board or rough-sawn wood, and not a roofline or gutter solution. Large displays may need more than one pack. Reported price: about $12.30.
Check Price on Amazon
Best Outdoor Extension Cord
GoGreen Power GG-13725 – 25 ft 16/3 SJTW Outdoor Extension Cord

A 25-foot outdoor-rated cord with a lighted end that shows when power is on, handy for reaching an outlet from a roofline or porch run.
- 16/3 SJTW cord, ETL listed
- Moisture-, abrasion- and sunlight-resistant jacket
- Lighted female end indicates power
- Rated up to 13 A / 1,625 W at 125 V
- Not for EV charging, per the manufacturer
Best for: Short runs from an outdoor outlet to a light display that stays within the cord’s rating.
Our verdict: Compare the cord’s 13 A / 1,625 W rating against the combined load of everything you plug in. At 25 feet it may be too short for larger yards. Reported price: about $15.99.
Check Price on Amazon
Best Connection Covers
Flemoon Outdoor Extension Cord Safety Covers – 3 Pack

Snap-lock enclosures that keep plug-to-cord connections shielded from rain, snow and dirt.
- Polypropylene boxes with rubber gaskets and cable clamps
- 10 mm cable entry ports, for 14-, 16- and 18-gauge cords
- Cable ties and side mounting holes for hanging
- Listing cites UL50, UL50E and CSA C22.2 conformity
- Not for power strips, right-angle plugs or large adapters
Best for: Protecting standard cord-to-plug joints that sit outdoors.
Our verdict: Check that your plugs fit the small interior before buying. Weather resistance does not make these submersible, so keep them raised off wet ground. Reported price: about $15.29 for three.
Check Price on Amazon
Best Timer With No Wi-Fi
BN-LINK Outdoor 7-Day Programmable Digital Timer – 2 Pack (U58S-2P)

A plain, app-free outdoor timer with two grounded outlets and a weatherproof cover.
- 8 on/off programs, 7-day scheduling
- Random and daylight saving time modes
- Rated 15 A / 1,875 W, ETL listed
- Outlets share the timer’s total capacity
- No Wi-Fi, app or voice control
Best for: Homes with weak outdoor Wi-Fi, or anyone who just wants lights on and off at set times.
Our verdict: Simple and reliable in concept, but programming is done at the unit and there is no remote control. The cover protects against rain and splashes; it is not meant for submersion. Reported price: about $28.99 for the two-pack.
Check Price on Amazon
Best Budget Smart Plug
Kasa Outdoor Smart Plug KP401 – 1-Socket Wi-Fi Outlet

A single-socket outdoor smart plug that adds app control, schedules and sunrise/sunset automation without a hub.
- IP64 protection against dust and splashes
- Rated up to 15 A / 1,875 W, ETL certified
- Sunrise/sunset automation, schedules and countdown timers
- Works with Alexa, Google Assistant and SmartThings
- 2.4 GHz Wi-Fi only
Best for: One outdoor light circuit that you want on a sunset schedule from your phone.
Our verdict: A low-cost way to get sunset scheduling. It has one socket, needs 2.4 GHz Wi-Fi at the outlet, and IP64 is not fully waterproof. The listing mentions no energy monitoring. Reported price: about $12.99.
Check Price on Amazon
Best Matter Smart Plug
Tapo P400M Matter Outdoor Smart Plug – 2 Outlets

A dual-outlet outdoor plug that supports Matter, so it can join several smart home platforms.
- Two independently controlled outlets
- Matter: Apple Home, Alexa, Google Home, SmartThings
- IP65, operating range -4°F to 122°F
- 15 A rating shared across both outlets, ETL certified
- Includes mounting screw and stabilizing post
Best for: Two lighting zones from one outlet, in a home that already uses a Matter-capable platform.
Our verdict: Great fit for mixed ecosystems, though both outlets share the total load and Matter needs a compatible controller. It requires 2.4 GHz Wi-Fi, and the 300-foot range is an open-field claim. Reported price: about $23.99.
Check Price on Amazon
Best for Apple Home Users
Kasa Apple HomeKit Outdoor Smart Plug (EP40A) – 2 Outlets

A two-outlet outdoor plug with HomeKit support, plus Alexa and Google Assistant compatibility.
- Two independently controlled sockets
- IP64 weather resistance, 2.4 GHz Wi-Fi only
- Works with HomeKit, Siri, Alexa and Google Assistant
- Scheduling and grouping in the Kasa app
- Covers for unused outlets
Best for: Households built around Apple Home who want two outdoor circuits.
Our verdict: HomeKit remote access needs a HomePod or Apple TV at home. The listing’s 15 A / 1,875 W figure is ambiguous, so confirm the total-load rating with the manufacturer before connecting heavy equipment. Reported price: about $19.98.
Check Price on Amazon
Best Replacement Bulbs
HLO Lighting 25-Pack C9 Faceted LED Bulbs – Sun Warm White (E17 Base)

Replacement C9 LED bulbs for fixing dead spots in compatible light strings without buying new ones.
- C9 faceted shape with E17 screw base
- Sun Warm White, plus other color options
- Indoor and outdoor use, shatter resistant
- Listed as dimmable
- 25 bulbs per pack
Best for: Owners of C9 strings with E17 sockets who want to replace failed or broken bulbs.
Our verdict: Check socket type and string compatibility first. The listing gives no wattage, lifespan or IP rating. These are replacement parts, not a complete string. Reported price: about $23.51, roughly $0.94 per bulb.
Check Price on Amazon
Best for Cord Storage
BAYCO KW-130 Cord Storage Reel – Pack of 6

Manual winding reels with a center spin handle for extension cords, holiday lights, ropes and hoses.
- Impact-resistant plastic, about 13 inches
- Center spin handle for winding
- Listed capacity up to 150 ft, depending on cord thickness
- Six reels per pack
- No weatherproofing for stored cords
Best for: Taking down the display and storing cords and strings without tangles.
Our verdict: Useful for end-of-season storage. Winding is manual, and capacity depends on how thick your cord is. The supplied listing shows no price or average rating, so check both before buying.
Check Price on Amazon
Best Light Storage Bag
Dazzle Bright Christmas Light Storage Bag with 3 Metal Reels

A zippered fabric bag with three metal reels for keeping separate light strings organized.
- Three reels, about 10.6 in diameter and 4 in wide
- Oxford fabric bag, 14.5 × 13 in
- Reinforced carrying handle and zipper closure
- Fits mini, string, C6 and C9 lights
- Foldable when empty
Best for: Keeping several strings separate and protected from dust and moisture between seasons.
Our verdict: Good for tidy storage, but the listing doesn’t state how many feet each reel holds, so bulky or long strings may not fit. The supplied listing shows no price or average rating.
Check Price on AmazonTroubleshooting Lights and Schedules
| Problem | First check | Next step |
|---|---|---|
| One string or section stays dark | Disconnect power and inspect the string and connectors | Follow the set’s bulb or fuse instructions; discard damaged equipment |
| The GFCI trips | Stop using the display and disconnect it when safe | Do not keep resetting it or bypass protection. Have persistent faults checked by an electrician |
| Lights work manually but miss the schedule | Enabled events, repeat days, AM/PM and device time | Check sunset location settings or the timer’s automatic mode |
| The plug will not pair | Required Wi-Fi band and signal at the intended outlet | Follow the model’s pairing guide; choose a conventional timer if reliable coverage is unavailable |
| Lights restart in the wrong effect | The light controller’s power-restoration behavior | Use its supported memory or scheduling function, if available |
Common Outdoor Christmas Lighting Mistakes
- Using indoor-rated lights outside. Without an outdoor rating on the box, the set isn’t designed for rain, cold or sun.
- Skipping the pre-test. A fault found on the ground costs minutes. The same fault found on the roofline costs a lot more.
- Overloading a circuit. Light strings, cords and controllers each have limits, and the smallest one is the real ceiling.
- Driving nails or staples through the wire. They can damage the insulation. Clips designed for each surface avoid the problem.
- Measuring exactly and buying short. A straight-line measurement misses bends, slack and unlit leads. Check the route and available string lengths before buying.
- Leaving connections on the ground. Standing water and plugs don’t mix, so lift and cover every joint.
Storing Your Lights So Next Year Is Easier
The cheapest fix for next year’s tangle is the way you pack up this year. Wind each string around a flat piece of cardboard or a reel, tuck the plug end into the middle, and label it with the run it belongs to, such as “roofline” or “front shrubs.”
Let the equipment dry before packing, and follow its storage instructions. Store everything in one bin with the compatible spare bulbs and leftover clips, and write down any set that failed so you can replace it before the season.
Outdoor Christmas Lights: Common Questions
How many strings can I connect together?
Use the maximum printed on the tag or box of the specific set. The limit depends on the brand and bulb type, and LED sets generally allow longer chains than incandescent ones. The extension cord and outlet carry their own ratings, and the lowest limit in the chain is the one that counts.
Can I leave Christmas lights on all night?
Switch holiday lights off before bed or leaving home, as CPSC recommends. A scheduled shutoff helps you remember, but you still need to turn the display off if you leave earlier. Follow the light set’s instructions as well.
Are LED Christmas lights worth it over incandescent?
For most outdoor displays, yes. LED strings draw less power, run cooler and typically allow longer connected runs. Warm-white LEDs are also available, so compare the actual color and appearance rather than assuming every LED set has a cool glow.
Can I use a smart plug with ordinary Christmas lights?
Yes, if the lights and plug are compatible and used within their ratings. The plug turns power on and off. For lights with a separate controller, check whether they resume their previous setting after a power interruption.
Can I hang Christmas lights without gutters?
Often, yes. Depending on the surface, suitable options include approved trim clips, railing ties, porch-post wraps and ground stakes. Choose hardware designed for your material and avoid damaging roofing or cable insulation.
When should I put up outdoor Christmas lights?
There is no required date. What matters is working on a dry, calm day. Because a timer or smart plug controls when the lights actually run, installing early does not mean they burn for weeks.
More Lighting and Smart Home Ideas
Once your outdoor display is sorted, you can bring the same attention to lighting indoors. Our kitchen ceiling lighting ideas and buying guide covers everyday room lighting, while these cozy bathroom decorating ideas explore a softer, more relaxing space.
For projects beyond lighting, browse our home improvement gadgets guide for other practical upgrades to consider.
Plan It Once, Enjoy It All Season
The pattern behind a trouble-free display is short: measure with a buffer, test at three points, hang with surface-appropriate hardware, keep the electrical side within every stated limit, and let a controller manage the schedule. None of it is complicated, but all of it is easier before the lights are up.
If you are planning your setup now, start with the roofline measurement and the outlet sketch. Tell us in the comments what you are lighting this year and whether a timer or smart plug fits your home, and share which part of the setup you found most useful.