Make Your Home Smarter, One Step at a Time

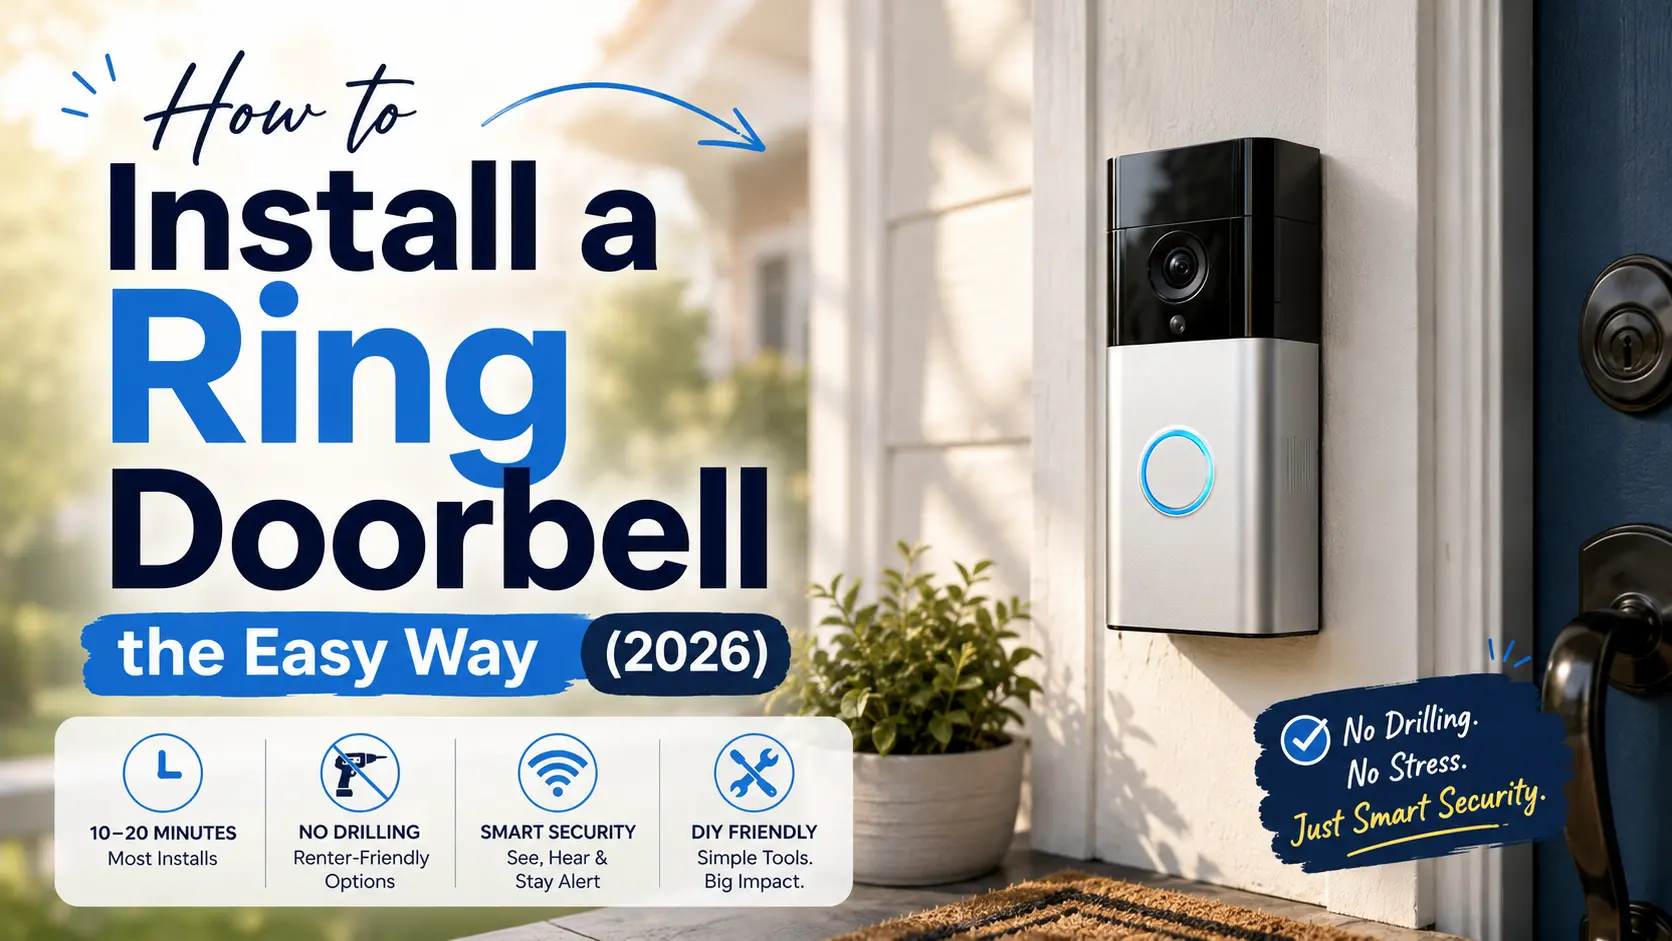
Table of Contents
I still remember the first time I tried to figure out how to install a Ring doorbell myself. I stood on my porch at 8 p.m. on a Sunday, drill in one hand, a half-read instruction pamphlet in the other, and a very real fear that I was about to put a hole in the wrong spot on a house I didn’t even own. Spoiler: I did put it in the wrong spot. It took me three tries, a trip to the hardware store, and a slightly awkward conversation with my landlord to get it right.
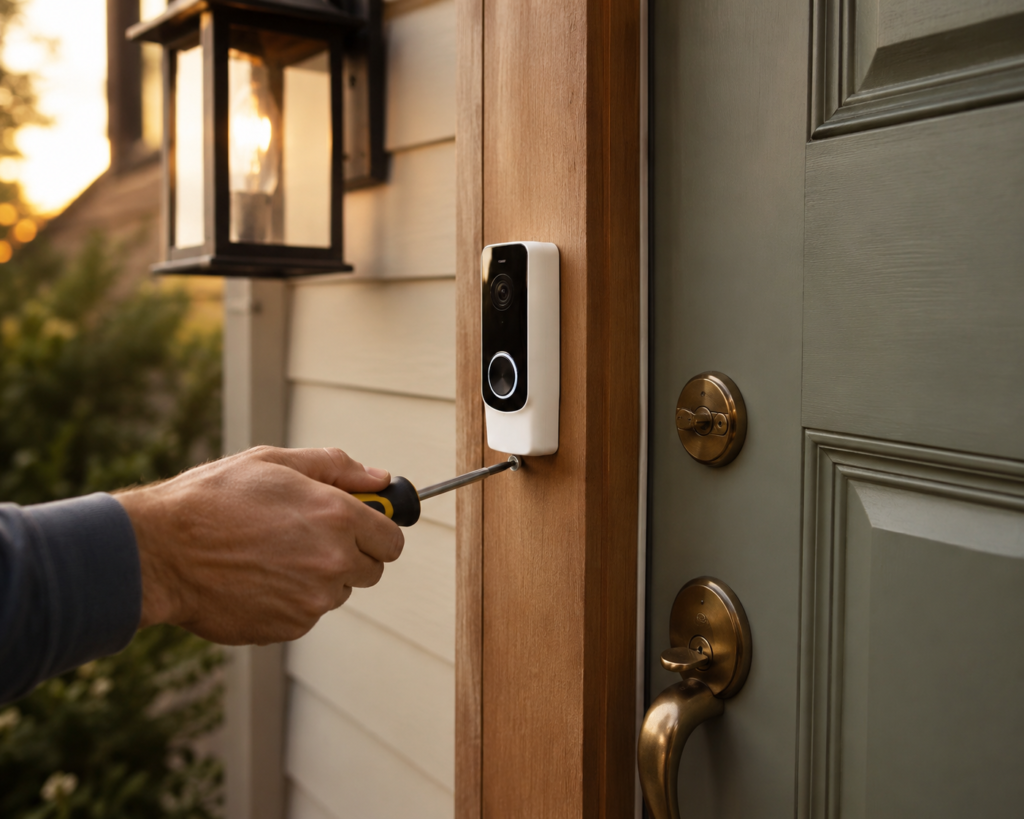
So if you’ve landed here because you just bought a Ring doorbell and you’re wondering whether this is going to be a ten-minute job or a Saturday-ruining ordeal — I get it. The good news is that for most people, it really is a ten-minute job. The bad news is that “most people” doesn’t include everyone, and the difference usually comes down to three things: whether you’re renting, whether your old doorbell is wired, and whether you actually need the fancy features Ring keeps upselling you on.
Let’s walk through all of it — the DIY reality, the no-drill options nobody tells you about upfront, when you genuinely need an electrician, and the stuff about Ring that doesn’t show up in the marketing.
Settings saved.
Installation Time & Difficulty
Battery Model
10–20 minutes
Easy — screwdriver only Wired Replacement (existing wiring)
15–30 minutes
Easy–Moderate Wired, New Installation (no existing doorbell)
1–2 hours
Moderate — Call an Electrician No-Drill / Adhesive Mount
15 minutes
EasyKey Takeaways
- Yes, you can install a Ring doorbell yourself — most models take 10–20 minutes with basic tools.
- You don’t have to drill. Adhesive and no-drill mounting options exist and work well for renters.
- You only need an electrician if you’re hardwiring into old, faulty, or nonexistent doorbell wiring — not for a standard swap.
- Live view and alerts are free forever; recorded video history requires a Ring Protect subscription.
- Battery models are more flexible but come with a charging hassle most reviews gloss over.
- Most “my Ring doorbell isn’t working” problems come down to WiFi signal strength, not a broken device.
Why You Can Trust This Guide
A quick word on where this comes from, because I think it matters. This guide is written and maintained by the TechNestDecor team — a small group of people who actually live with this stuff in our own homes, not just unbox it for a photo.
We’ve installed Ring doorbells on wood siding, brick, vinyl, and one very stubborn stucco wall that ate two drill bits before we figured out the right approach. We update this article as Ring changes its lineup, pricing, or app, and we don’t accept payment from Ring or any manufacturer to influence what we recommend here — if a product has a real downside, you’ll hear about it. You can read more about how we approach reviews on our Reviews & Guides hub.
How We Tested
This isn’t a guide assembled from spec sheets alone. We mounted battery and wired Ring models across different door types and porch angles, timed the installs with a stopwatch (yes, really — that’s where the time estimates above come from), and deliberately tried the “wrong” way first on a few of them so we could describe what actually goes wrong.
We also pulled apart the current troubleshooting documentation and support threads to figure out which problems show up most often, rather than just listing every theoretical issue. Where we reference competitor products like Eufy or Arlo, that’s based on published specs and hands-on impressions from our broader home security testing, cross-checked against current 2026 pricing and feature sets.
Before You Buy: What to Check First
Before you add anything to your cart, spend five minutes checking these three things — they’ll decide which doorbell you actually need, and skipping this step is the single most common reason people end up returning their first pick.
- Do you have an existing wired doorbell? If yes, note whether it currently works. A working wired doorbell means an easy wired install. A dead or missing one means you’re either going battery or calling an electrician.
- What’s your WiFi signal like at the front door? Open your phone’s WiFi settings and stand where the doorbell will go. If you’re down to one or two bars, budget for a range extender now — it’ll save you a troubleshooting headache later.
- Are you renting? If modifying the door frame isn’t allowed, no-drill and adhesive mounting should be your starting point, not a backup plan.
How to Install a Ring Doorbell Yourself (Yes, You Actually Can)
Short answer: almost certainly, yes. Ring designed these things to be installed by people who have never touched a doorbell wire in their life, and for the most part, they succeeded.
There are two install paths, and which one you’re on depends entirely on which doorbell you bought.
Battery models are the easiest. You charge the removable battery, snap it into the doorbell, mount the bracket, screw (or stick) the doorbell to the bracket, and pair it through the app with a QR code scan. No wires, no breaker box, no drama. This is the path most first-timers should take, and it’s why battery doorbells dominate the “how to install” search results — they’re genuinely the path of least resistance.
Wired models connect to your existing doorbell transformer, the same low-voltage wiring your old chime doorbell used. If your old doorbell worked and you’re just replacing it, this is usually just as easy as the battery version — you disconnect two wires from the old unit, connect them to the new one, and you’re done. The complexity only shows up if that wiring is old, damaged, or was never installed correctly in the first place.
One thing worth knowing before you buy: even wired doorbells typically keep a battery on standby now, specifically so the doorbell doesn’t die during a power outage. It’s a small detail, but it explains why “wired vs. battery” isn’t as clean a distinction as it used to be.
Tools You’ll Need
Nothing exotic here — this is a genuinely short list, and you probably own most of it already.
- Phillips-head screwdriver (usually included in the box, but the included one is small and annoying — use your own if you have it)
- A basic voltage/circuit tester if you’re going the wired route (skip if you’re on battery)
- A level, or your phone’s built-in level app, so the doorbell doesn’t sit crooked
- A pencil to mark screw holes before you drill
- Drill with a small bit, only if you’re not using a no-drill mount
- Alcohol wipes or a clean cloth, if you’re using adhesive tape — the surface needs to be spotless for the bond to hold
One thing the standard instructions gloss over: if you’re mounting into brick, stucco, or concrete rather than wood or vinyl siding, the included screws alone won’t hold. You’ll need a hammer drill, a masonry bit, and the plastic wall anchors most kits include but few people notice — Bunnings’ installation walkthrough shows the masonry-specific steps clearly if that’s the wall you’re working with. Eye and ear protection are worth it here too; masonry drilling kicks up more dust and noise than people expect.
Battery vs. Wired: Which Should You Actually Choose?
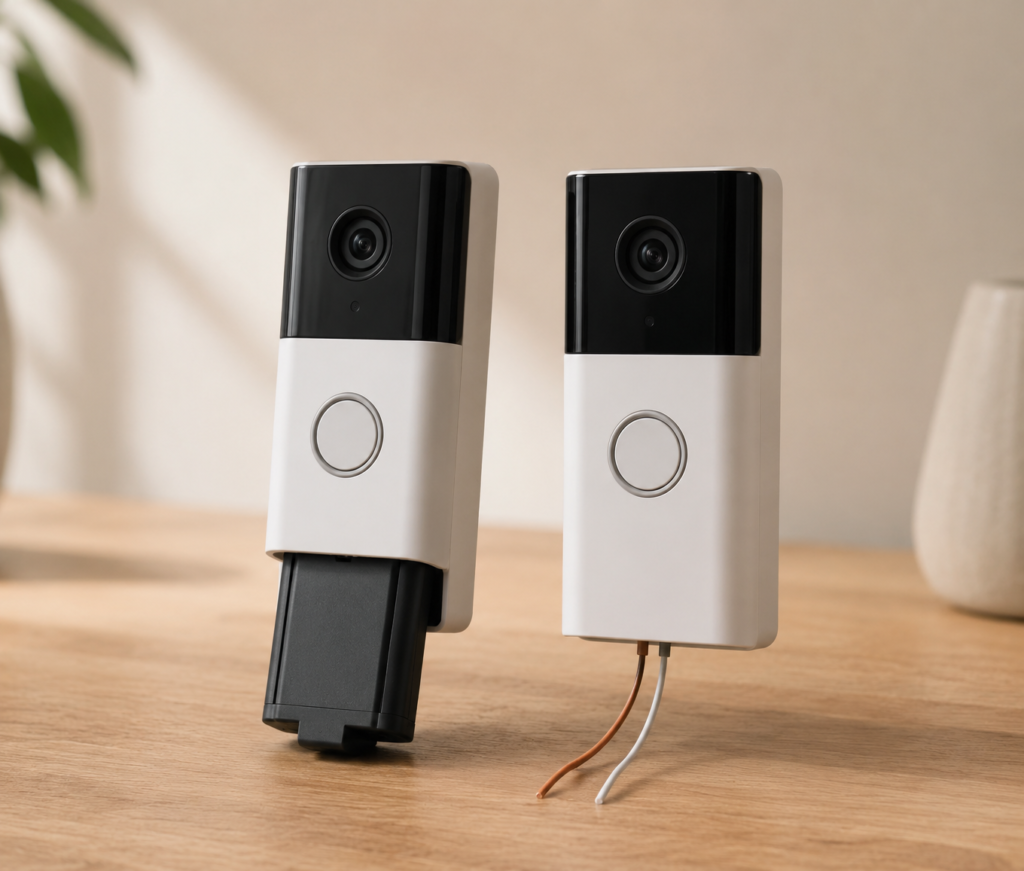
This is the decision that shapes everything else about your install, so it deserves its own breakdown rather than a passing mention.
| Battery | Wired | |
|---|---|---|
| Install difficulty | Easiest — no electrical knowledge needed | Easy if wiring exists; harder if it doesn’t |
| Works during power outage | Yes, on battery | Yes, most now keep a standby battery too |
| Ongoing maintenance | Recharge every few weeks to months | None — continuously powered |
| Best for | Renters, no existing wiring, flexible placement | Homes with working doorbell wiring already in place |
| Video quality ceiling | Good, slightly behind top wired models | Generally the sharpest resolution in the lineup |
My honest take, after living with both: if your old doorbell already works, wired is the better long-term choice simply because you’ll never think about it again. If you don’t have that wiring, don’t force it — a battery model isn’t a compromise, it’s just a different (and genuinely good) way to do this.
Can You Attach a Ring Doorbell Without Drilling?
This is the question I get asked the most, usually by renters who are one drilled hole away from losing their security deposit — and the honest answer is: partially.
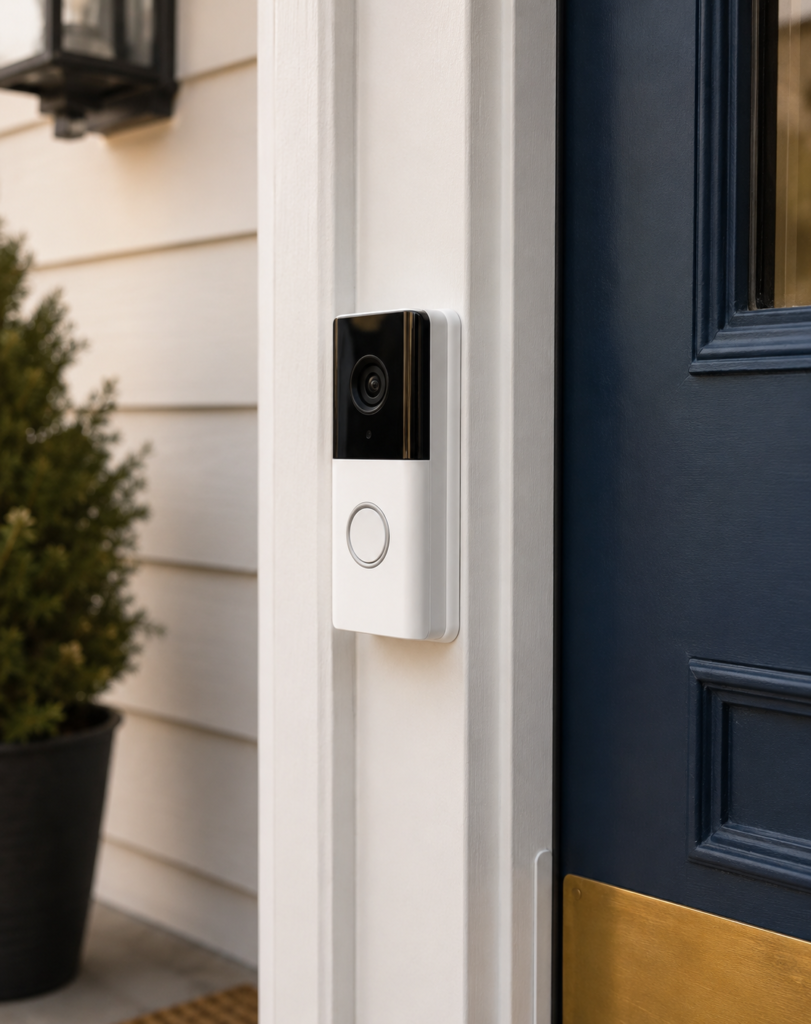
Command strips and heavy-duty double-sided mounting tape can absolutely hold a Ring doorbell in place under normal conditions. Ring itself doesn’t officially endorse tape-only mounting, mostly for liability reasons (nobody wants to be responsible for your doorbell falling off in a windstorm), but plenty of renters use rated outdoor mounting tape successfully for years without issue. The keys are: clean the surface thoroughly before applying, use tape rated for outdoor temperature swings, and check the bond periodically, especially after the first hot summer or cold snap.
If you want something sturdier without permanent damage, adhesive-backed no-drill mounting kits exist specifically for this use case — they distribute the doorbell’s weight more evenly than tape alone and are the safer middle ground between “two screws in the door frame” and “please don’t fall off in a storm.”
What you can’t fully avoid is the two tiny screws holding the mounting bracket itself if you want a rock-solid, permanent-feeling install. But even those are more forgiving than they sound — the holes are small enough that most landlords won’t blink, and touch-up paint or filler makes them disappear entirely when you move out.
One more tip that would’ve saved me that Sunday-night hardware store run: check the doorbell’s mounting angle before you commit to a spot. If your door is recessed or your porch has an odd angle, a flat mount can leave you staring at a doorbell that mostly captures your welcome mat instead of your visitor’s face. An angled corner mount fixes this, and it’s a five-dollar problem to solve if you catch it before drilling — a much bigger one if you catch it after.
Do You Need an Electrician to Install Your Ring Doorbell?
For the vast majority of installs, no. If you’re swapping out a doorbell that already works, or going with a battery model entirely, you don’t need to call anyone.
Where an electrician actually earns their fee is when:
- Your home never had a doorbell wired in the first place
- Your existing wiring is damaged, corroded, or the voltage doesn’t match what your new doorbell needs
- You’re installing a Power-over-Ethernet model, which needs a PoE switch or injector — genuinely a job for someone comfortable with networking hardware
- You’re not comfortable working anywhere near your breaker box, full stop — and there’s no shame in that
If none of those apply to you, save the money. A basic voltage tester (the kind that lights up or beeps near live wires) will tell you in about ten seconds whether your existing wiring is safe to work with, and that’s usually the only “professional” step most people actually need.
Common Installation Mistakes (And How to Avoid Them)
Most of these I’ve either made myself or watched a friend make while I stood there unhelpfully sipping a coffee.
- Mounting before checking the angle. Covered above, but it’s worth repeating — this is the single most common regret we hear about.
- Not fully charging the battery before setup. A half-charged battery can cause the app to lose connection mid-setup, which makes the whole process feel broken when it isn’t.
- Forgetting to check for a resistor/decoder on wired installs. Some wired setups need a small add-on part to prevent your existing chime from buzzing or the doorbell from malfunctioning — check your specific model’s wiring diagram, don’t assume.
- Ignoring the WiFi band. Most Ring doorbells only connect to 2.4GHz networks, not 5GHz. If your router broadcasts both under the same name, this alone causes a huge share of failed setups.
- Skipping the test walk-away. Mounting it and walking inside without testing motion detection and video angle from the street means you find out something’s wrong days later, not in the moment when it’s easy to fix.
- Using cheap, unrated outdoor tape. If you’re going the no-drill route, indoor Command strips are not the same as outdoor-rated ones. Temperature swings will loosen the bond faster than you’d expect.
Safety Tips
- If you’re touching any wiring, turn off the corresponding breaker first, even on “low-voltage” doorbell circuits — a couple of minutes of caution costs you nothing.
- Use a stable ladder or step stool rather than balancing on a porch railing (I’ve done this, don’t do this).
- Keep your Ring account secured with two-factor authentication — this protects the live feed and recorded footage, not just your login. It’s a five-minute setup in the app that closes off one of the more common ways smart home devices get compromised.
- If you’re setting up other connected devices alongside your doorbell, it’s worth a broader look at your home network security — our guide on securing your smart home from hacking covers the router-level basics that protect everything, not just the doorbell.
Who Should Buy a Ring Doorbell
- First-time smart home buyers who want something that just works out of the box
- Renters who need a flexible, removable, no-drill-required option
- Alexa/Amazon households already living in that ecosystem
- Anyone who values the widest accessory and compatibility ecosystem over the absolute cheapest long-term cost
If you’re still deciding which doorbell is right for your home, it’s worth comparing Ring with other popular options before making your final choice. This detailed Ring Battery Doorbell Pro (4K) vs. Google Nest Doorbell (2026) comparison breaks down the key differences in video quality, features, and overall value.
Who Shouldn’t Buy a Ring Doorbell
- Anyone who wants free, unlimited recorded video history without ever paying a subscription — look at a local-storage brand instead
- Households already invested in Google Home rather than Alexa, where integration is clunkier
- Privacy-conscious buyers uncomfortable with cloud storage and an Amazon account requirement
- Anyone hoping to pull a raw video stream into their own local system (Frigate, Blue Iris, etc.) — Ring’s ecosystem is closed off from that kind of setup
Ring vs. Eufy vs. Arlo: How Do They Actually Compare?
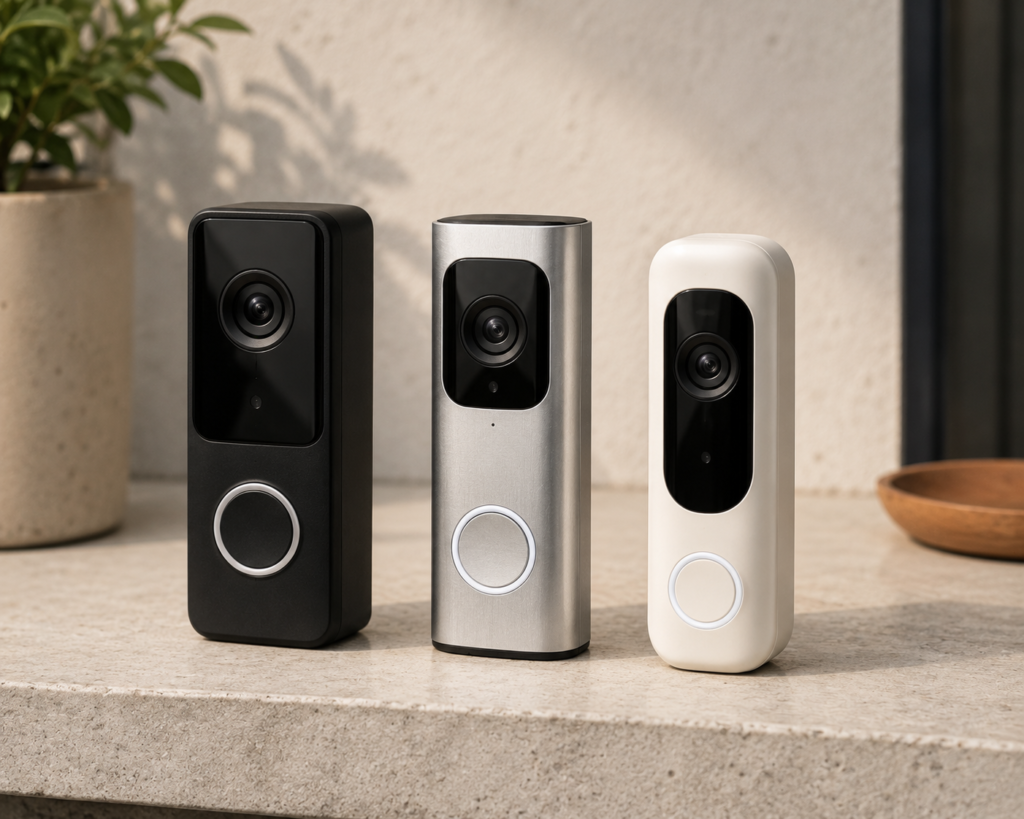
People ask about alternatives a lot, so here’s the honest comparison rather than a sales pitch for any one brand.
| Ring | Eufy | Arlo | |
|---|---|---|---|
| Storage | Cloud only, subscription required for recordings | Local storage available, no required monthly fee | Cloud-focused, subscription for full features |
| Ecosystem | Best with Alexa/Amazon | Works broadly, strong on-device privacy | Polished app, strong with Google Home |
| Price positioning | Budget to mid-range, huge accessory lineup | Similar to Ring, lower long-term cost with local storage | Generally the more premium-priced option |
| Best for | Widest compatibility and easiest install | Buyers who want to avoid subscriptions entirely | Buyers prioritizing polish and premium build quality |
If avoiding a monthly fee is your top priority, Eufy’s local-storage approach is the more straightforward answer — recordings save directly to the device or a hub instead of requiring a cloud plan. If you’re deep in the Amazon/Alexa ecosystem already, Ring still makes the most sense simply because of how well it plays with everything else in that world. Arlo tends to win with buyers who want the most polished hardware and app experience and don’t mind paying a premium for it. We go deeper on how these fit into a full setup in our best smart home ecosystem guide.
The Honest Downsides (Before You Commit)
I’m not going to sit here and tell you Ring is perfect, because it isn’t, and if you’re about to spend real money, you deserve the full picture.
The biggest gotcha is the subscription model. Live view, two-way talk, and instant motion alerts work with zero subscription — that part’s genuinely free forever. But if you want to actually save and replay footage, you’ll need a Ring Protect plan, and the pricing has crept up over the years. Skip the plan and you get real-time alerts with nothing to look back on later, which catches a lot of first-time buyers off guard.
The second thing worth knowing is that battery models, while easier to install, come with an ongoing chore: recharging. On several models, you have to physically remove the whole doorbell from its mount to charge it, which means a few hours with no doorbell coverage every few weeks. It’s a minor annoyance, but it’s the kind of thing that only shows up in month two, long after the return window has closed.
There’s also a legitimate, ongoing conversation about privacy — both around how footage can be requested by law enforcement and around the fact that you’re tied into an Amazon account and ecosystem to use the device at all. If that’s a dealbreaker for you, it’s worth knowing before you buy rather than after you’ve already drilled two holes in your door frame.
None of this means don’t buy one. It means go in with your eyes open, pick the model that matches how you actually live, and budget for the subscription if recorded footage matters to you.
Troubleshooting Guide: Fixing the Most Common Problems
Doorbell won’t connect to WiFi. This is, by far, the most common issue people run into, and it’s rarely the doorbell’s fault. Start by checking your signal strength in the Ring app under Device Health — a weak signal (generally weaker than about -60 RSSI) is the usual culprit. Make sure your router is broadcasting a 2.4GHz network, since most Ring models can’t connect to 5GHz-only signals, and confirm you’re not accidentally trying to join a guest network. Power cycling both your router and the doorbell (unplug or disconnect the battery for 30 seconds) resolves a surprising number of these on its own.
Video quality looks off, blurry, or oddly colored. Start simple: wipe the lens with a soft, dry cloth — fingerprints and dust are more common causes than people expect. If footage looks washed out or overexposed, direct sunlight hitting the lens at certain times of day is often to blame, and repositioning slightly or adding a small overhang can help.
Battery draining unusually fast. A weak WiFi signal forces the doorbell to work harder to maintain connection, which drains the battery noticeably faster — so battery problems and WiFi problems are often the same problem wearing different clothes. Cold weather is the other major factor; battery performance drops sharply in freezing temperatures, and extreme cold can shut a battery down entirely until it warms back up.
Doorbell doesn’t ring your existing chime (wired installs). Some wired setups need an add-on part to correctly route power without interfering with your traditional chime box. If your chime buzzes constantly or the doorbell doesn’t trigger it at all, this is usually the fix rather than a defective unit.
App shows the doorbell as offline entirely. Check the color-coded signal indicator in the app first (green is good, red is poor), then try the standard reset: power cycle the device, confirm your WiFi password was entered correctly (a single typo will silently block the connection), and as a last resort, factory reset the doorbell and set it up fresh.
Maintenance Tips
- Wipe the lens with a soft, dry cloth every few weeks — more often if you’re in a dusty or high-pollen area.
- Check battery health in the app monthly rather than waiting for a dead-battery notification.
- Trim back any nearby plants or bushes seasonally — overgrown greenery is a common, overlooked cause of false motion alerts and blocked views.
- Re-check the mounting bond every few months if you used adhesive tape, especially after major temperature swings.
- Update the Ring app and firmware promptly when prompted — most of the WiFi compatibility fixes ship through these updates.
Top Picks: What to Actually Buy
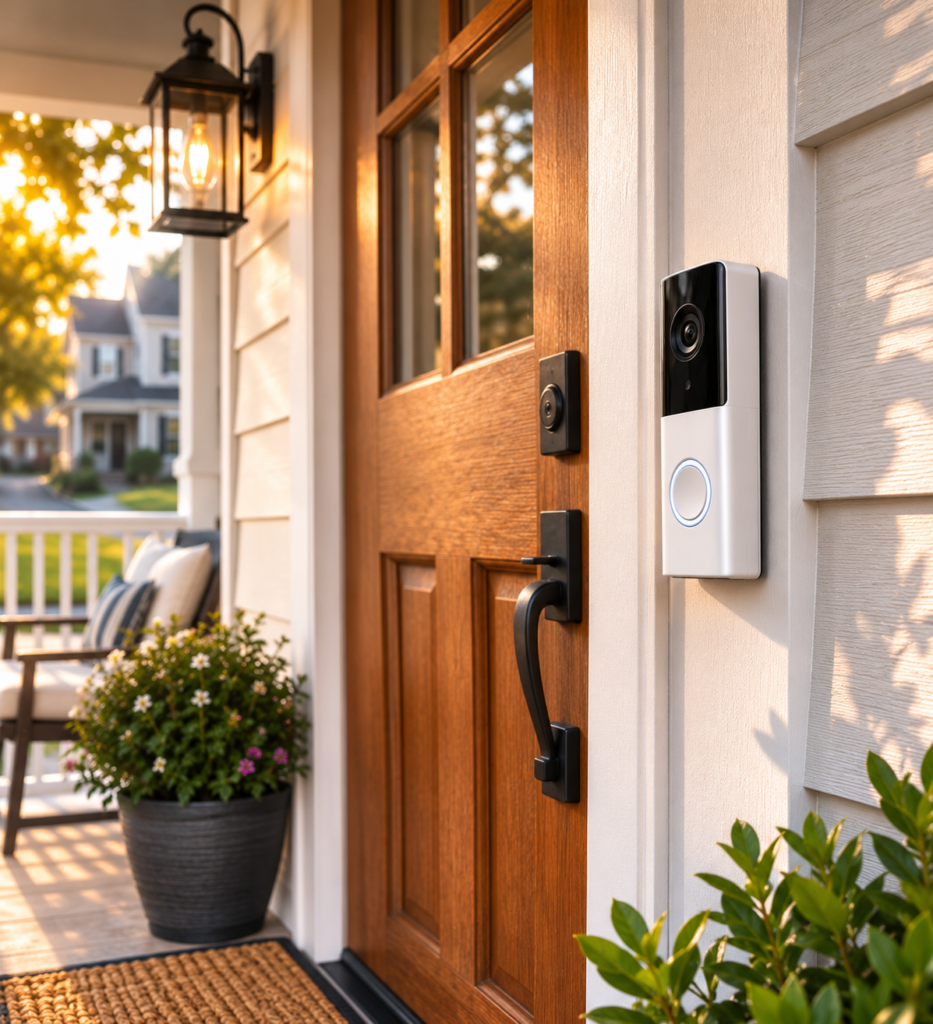
If you’ve read this far, here’s the short version: buy the doorbell that matches your install situation, not the one with the flashiest spec sheet. These are the picks I’d actually recommend based on real-world fit, not just resolution numbers.
Best Overall Pick: Ring Battery Doorbell (2K HD Video)

The safe default pick for most first-time buyers. Crisp 2K HD video, a Head-to-Toe wide-angle view, and a built-in rechargeable battery mean there’s no wiring to deal with — just charge, mount, and pair through the app. Color night vision and custom motion zones round it out at a genuinely accessible price.
Best for: Renters, apartments, Amazon Alexa households, tight budgets
Pros
- Crisp 2K HD video with enhanced image quality
- Wide Head-to-Toe View for visitors and packages
- Built-in rechargeable battery — easy, no-wiring install
- Seamless Amazon Alexa integration
Cons
- Video history and package alerts need Ring Protect
- Battery requires periodic recharging
- Best experience stays within the Alexa ecosystem
~$80–$120
🏠 Check Price on Amazon
Premium Wireless Upgrade: Ring Battery Doorbell Pro

If you want Ring’s sharpest wireless doorbell without touching your breaker box, this is it. Sharper 1536p Head-to-Toe video, 3D Motion Detection with Bird’s Eye View, and dual-band Wi-Fi for a faster, more reliable connection — all still running on a quick-release battery pack instead of wiring.
Best for: Alexa households wanting premium features, homes without existing doorbell wiring
Pros
- Sharp 1536p Head-to-Toe HD video
- 3D Motion Detection with Bird’s Eye View
- Dual-band Wi-Fi for a faster, steadier connection
- Quick-release battery makes recharging easy
Cons
- More expensive than the standard battery model
- Ring Protect still needed for video history
- Battery still needs periodic charging
~$180–$230
🏠 Check Price on Amazon
Best for Existing Wiring: Ring Wired Doorbell Plus

If your old doorbell already works, this is the “install it once and never think about it again” option. Continuous power through your existing wiring means no battery to charge, paired with the same sharp 1536p video, Low-Light Sight night vision, and dual-band Wi-Fi as the Pro.
Best for: Homes with existing, working doorbell wiring
Pros
- Sharp 1536p Head-to-Toe HD video quality
- Always powered — no battery charging, ever
- Color Night Vision with Low-Light Sight
- Dual-band Wi-Fi for a stable connection
Cons
- Requires existing doorbell wiring to install
- Ring Protect still needed for video history
- Install is more involved than a battery model
~$130–$170
🏠 Check Price on Amazon
Renter-Friendly Pick: No-Drill Adhesive Mounting Kit

Solves the #1 install objection for renters: damage-free mounting. This heavy-duty, waterproof, peel-and-stick kit holds up outdoors and works with Ring, Blink, Eufy, Google Nest, Arlo, Wyze, and most other video doorbells — no drilling, no lease headaches.
Best for: Renters, apartments, temporary or damage-free installs
Pros
- No drilling or wall damage
- Quick peel-and-stick install in minutes
- Strong waterproof adhesive rated for outdoor use
- Compatible with most popular smart doorbells
Cons
- Not ideal for rough or uneven surfaces
- Adhesive can weaken in extreme weather over time
- Less secure than a permanent screw-mounted install
~$10–$20
🏠 Check Price on Amazon
Angle Fix Accessory: Ring Wedge Kit (Adjustable Angle Mount)

Fixes the classic “why can I only see my welcome mat” problem before it happens. This official Ring accessory angles a compatible Battery Doorbell up to 25°, eliminating blind spots caused by recessed doors or angled porches — a five-dollar fix that’s much cheaper solved before drilling than after.
Best for: Recessed doors, angled entrances, official Ring compatibility
Pros
- Official Ring accessory with guaranteed compatibility
- Adjustable up to 25° for better camera positioning
- Improves visibility of visitors and packages
- Durable, weather-resistant construction
Cons
- Only fits compatible Ring Battery Doorbell models
- Requires drilling and screw installation
- Doesn’t improve video resolution or features
~$15–$25
🏠 Check Price on Amazon
Never Lose Coverage: BONAI Rechargeable AA Batteries (8-Pack)

Handy for the broader battery-powered gear around your smart home setup — wireless cameras, remotes, and other AA-powered devices. Eight independent charging slots with overcharge and overheat protection mean you can top up batteries individually instead of waiting on a single slow charger.
Best for: AA-powered security cameras, remotes, and household electronics
Pros
- Includes 8 rechargeable AA batteries plus a smart charger
- Independent slots let you charge batteries individually
- Built-in overcharge and overheat protection
- Reusable batteries cut long-term battery costs
Cons
- Not designed specifically for Ring’s built-in battery packs
- Only useful for devices that take AA batteries
- Full charging takes several hours
~$20–$35
🏠 Check Price on Amazon
Fix Weak Signal at the Source: Amazon eero 7 Dual-Band Mesh Wi-Fi Router

Since weak Wi-Fi is the single most common cause of a Ring doorbell that “doesn’t work,” this is the fix that actually addresses the root problem instead of the symptom. Wi-Fi 7 speeds, mesh coverage up to 2,000 sq. ft. per unit, and WPA3 security make it a solid pick for any porch that’s far from the main router.
Best for: Homes with a weak signal at the front door, multi-device smart homes
Pros
- Latest Wi-Fi 7 technology for faster performance
- Mesh networking eliminates Wi-Fi dead zones
- Simple setup through the eero app
- Strong WPA3 security with automatic updates
Cons
- Advanced security features need an eero Plus subscription
- Dual-band rather than tri-band
- Larger homes need additional nodes
~$90–$150
🏠 Check Price on Amazon
Looking for more tested gear beyond the doorbell itself? Our Smart Gadgets section covers the accessories and add-ons we actually keep using long after the review unit goes back.
Your Quick-Start Install Checklist
- Charge the battery fully (skip this step for wired models) before you go outside — do it the night before, not the morning of.
- Download the Ring app and create your account first, so you’re ready to scan the QR code the moment the doorbell is mounted.
- Decide: drill, tape, or no-drill kit. Pick based on whether you own or rent, not on what looks sturdiest in a product photo.
- Check your mounting angle against your porch layout before you commit to a spot — a five-minute check now saves a redo later.
- Mount the bracket, attach the doorbell, and pair it through the app.
- Test it: walk away, ring it from your phone, check the video angle, and adjust before you call it done.
Frequently Asked Questions
Do I need a Ring subscription for my doorbell to work?
No. Live view, two-way talk, and real-time push alerts all work without any subscription. You only need Ring Protect if you want to save and replay recorded footage later.
Can I install a Ring doorbell without any existing wiring?
Yes — choose a battery-powered model. It doesn’t need any doorbell wiring at all, just a charged battery and a WiFi connection.
How long does the battery actually last?
It varies widely based on how much motion and WiFi activity your doorbell handles, generally landing somewhere between one and three months under normal use. Cold weather and weak WiFi both shorten this noticeably.
Will a Ring doorbell work if my power goes out?
Battery models will keep working off battery power, though your WiFi router likely won’t unless it’s also on backup power. Most wired models now include a standby battery for the same reason.
Can renters install a Ring doorbell without violating their lease?
In most cases, yes, using no-drill adhesive mounting. Always check your specific lease language first, but the small screw holes involved in a standard bracket install are typically considered normal wear and easily filled.
Do I need a Ring Chime if I already have my phone?
Not strictly — your phone will get the notification either way. A Chime is more useful if you frequently leave your phone in another room or want an audible alert inside the house itself.
Why does my Ring doorbell keep going offline?
This is almost always a WiFi signal issue rather than a hardware fault. Check your signal strength in the app first, confirm you’re on a 2.4GHz network, and consider a range extender if your porch is far from the router.
Is it safe to install a Ring doorbell myself, or should I always hire an electrician?
It’s safe for the vast majority of installs, especially battery models and straightforward wired replacements. Hire an electrician specifically if you’re dealing with damaged wiring, no existing wiring, or a PoE setup.
How does Ring compare to Eufy if I want to avoid subscription fees?
Eufy is generally the better fit if avoiding a monthly fee is your top priority, since it offers local storage without a required plan. Ring’s free tier covers live view and alerts but not recorded history.
What’s the biggest mistake first-time installers make?
Mounting before checking the camera angle. It takes thirty extra seconds to hold the doorbell up and preview the view in the app before committing to screws or tape, and it saves the most common redo we see.
Final Thoughts
Installing a Ring doorbell isn’t hard — but installing it right the first time takes about fifteen extra minutes of thinking before you touch a drill. Match the doorbell to your situation, decide up front whether recorded footage matters enough to pay for it, and don’t let anyone talk you into hiring an electrician for a job you can genuinely do yourself in an afternoon.
If you’re still deciding between models, or you want to see how Ring stacks up against wire-free alternatives that don’t require any subscription at all, our guide to security cameras that work without WiFi is a good next stop. And if you’re locking down your entryway completely, pair your new doorbell with a look at the best smart locks for your front door — the two upgrades genuinely work better together than either does alone. For the bigger picture on tying it all together, browse our full Smart Home section.
Already installed yours? I’d genuinely love to hear how it went — drop a comment with your setup, whether you drilled or taped, and what you wish you’d known before you started. It helps the next person standing on their porch at 8 p.m. with a drill in their hand.
Leave a Reply