Make Your Home Smarter, One Step at a Time

By the TechNest Decor Editorial Team | Last updated: September 2026
Table of Contents
If you’re trying to figure out how to install a home security system without paying a fortune, here’s the story that convinced me it’s easier than people think. A friend of mine got a quote from a national security company last spring: $1,200 for equipment, plus a technician visit, plus a contract she didn’t fully understand until she was three years into it. She called me venting, and I told her what I’m about to tell you — she didn’t need any of that. She needed a $250 box from Amazon and about forty-five minutes on a Saturday.
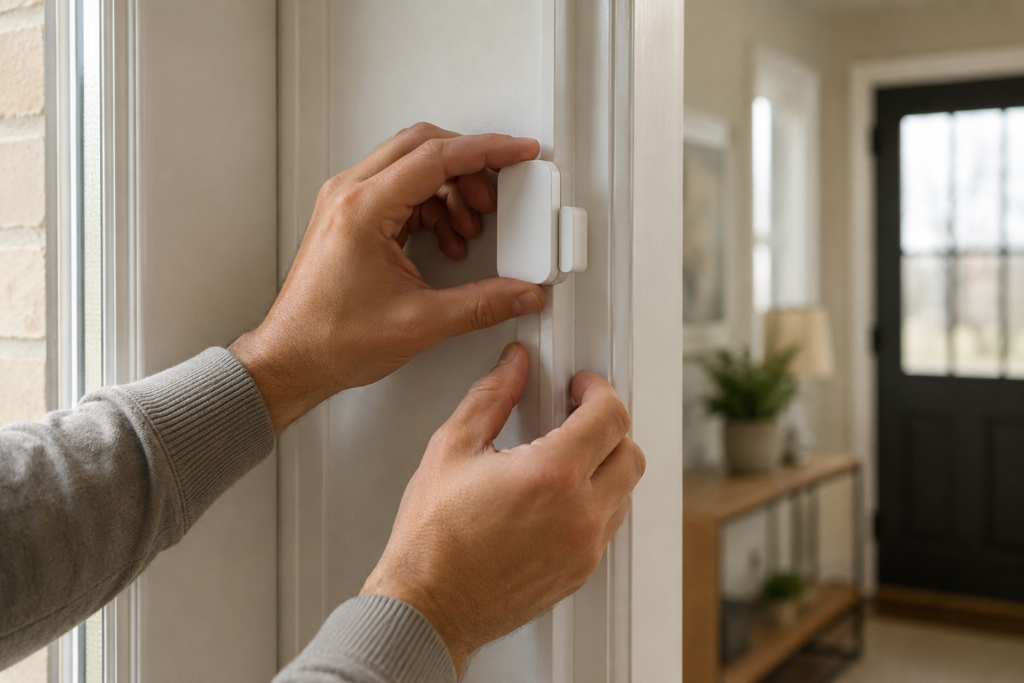
That’s not a knock on professional installers. There’s still a place for them, especially for big homes with a lot of wiring involved. But for the vast majority of homeowners and renters, the security industry has quietly gone DIY — and most people haven’t caught up to that fact yet. Modern systems pair to your phone in minutes, run on batteries and adhesive strips instead of drilled wiring, and often cost less per year than what you’d pay a company just to show up.
Settings saved.
Quick Answer
Installing a home security system yourself takes three basic steps: mount the base station or hub in a central location, pair each sensor and camera through the manufacturer’s app, and test every entry point before arming the system. Most systems (Ring, SimpliSafe, Wyze, Abode) are built for this — no wiring, no technician, no appointment. A small home takes 30-45 minutes; a full house with multiple sensors and cameras takes 60-120 minutes.
This guide walks through exactly how to install a home security system yourself — what to gather beforehand, the full step-by-step process, where sensors and cameras actually belong, and how to fix the handful of things that commonly go wrong along the way.
Do You Actually Need Professional Installation?
Here’s the myth that keeps the professional-install industry alive: people assume a “real” security system needs wires run through the walls and a technician with a drill. That was true fifteen years ago. It isn’t anymore.
Today’s leading systems are built around wireless sensors, battery-powered cameras, and setup apps that walk you through pairing every device step by step. The base station plugs into an outlet. The door and window sensors stick on with adhesive backing. The whole thing talks to your Wi-Fi (and often a cellular backup) instead of needing a hardwired phone line.
| Factor | DIY Install | Professional Install |
|---|---|---|
| Time to protection | Same day | Scheduled appointment, often days out |
| Upfront cost | Lower — equipment only | Higher — install fee on top of equipment |
| Contract | Usually none | Often required (multi-year) |
| Best for | Renters, apartments, most single-family homes | Very large homes, complex wiring, zero interest in setup |
If you want the fuller breakdown of contract terms, monthly fees, and which brand fits which budget, our honest alarm system for house guide covers that decision in detail. This article focuses on the part that guide doesn’t: actually doing the install.
What You Need Before You Start
Before you open the box, a few things make the process smoother:
- A strong Wi-Fi signal at your planned base station location. Check your router’s signal strength where you intend to place the hub — dead zones cause more setup headaches than any other single factor.
- Your phone and the manufacturer’s app downloaded and account created. You’ll need this before you touch any hardware, since pairing happens through the app.
- A list of every entry point you want covered — not just the front door. Walk your home first and note every ground-floor door and window.
- Isopropyl alcohol wipes or a damp cloth. Adhesive-backed sensors hold far better on a clean, dust-free surface — this is a small step that prevents a lot of “why won’t this sensor stay stuck” frustration later.
- A central smart home control panel, if you’re running more than one system. If you’re also managing locks, lights, or a thermostat, our smart home control panel buying guide covers how to bring everything into one dashboard instead of juggling separate apps.
Step-by-Step: Installing Your System
The exact screens will vary by brand, but the process is remarkably consistent across every major DIY system. Here’s what to expect.
- Unbox and charge. Some cameras ship with a partial charge — give them a few hours before mounting so you’re not stuck waiting mid-install.
- Download the app and create an account. This is also where you’ll set up your emergency PIN and, if you’re opting in, your monitoring plan.
- Set up the base station or hub first. Plug it in near the center of your home, not tucked in a closet — it needs a clear path to talk to your Wi-Fi and to every sensor.
- Pair each sensor one at a time. The app will prompt you to add a device, then walk you through naming it (e.g., “Front Door,” “Back Window”) so alerts make sense later.
- Clean the surface, then mount as you go. Wipe down the mounting spot before applying adhesive strips — this single step is the difference between a sensor that stays put for years and one that falls off in six months.
- Test every entry point before you arm the system. Open every door and window you’ve sensored and confirm the app registers it. This is the step people skip, and it’s the one that actually catches a bad connection or loose mount.
- Do a live test with monitoring, if you’ve subscribed. Trigger the alarm intentionally (most systems have a test mode) so you know what a real dispatch call looks like before it’s real.
Total time: most people finish in 30-60 minutes for a small home, closer to 90-120 minutes if you’re covering a larger house with more sensors and a couple of cameras. If a doorbell camera is part of your setup, our dedicated guide to installing a Ring doorbell without drilling a hole you’ll regret covers that specific device in more depth.
Where to Place Sensors and Cameras for Best Coverage
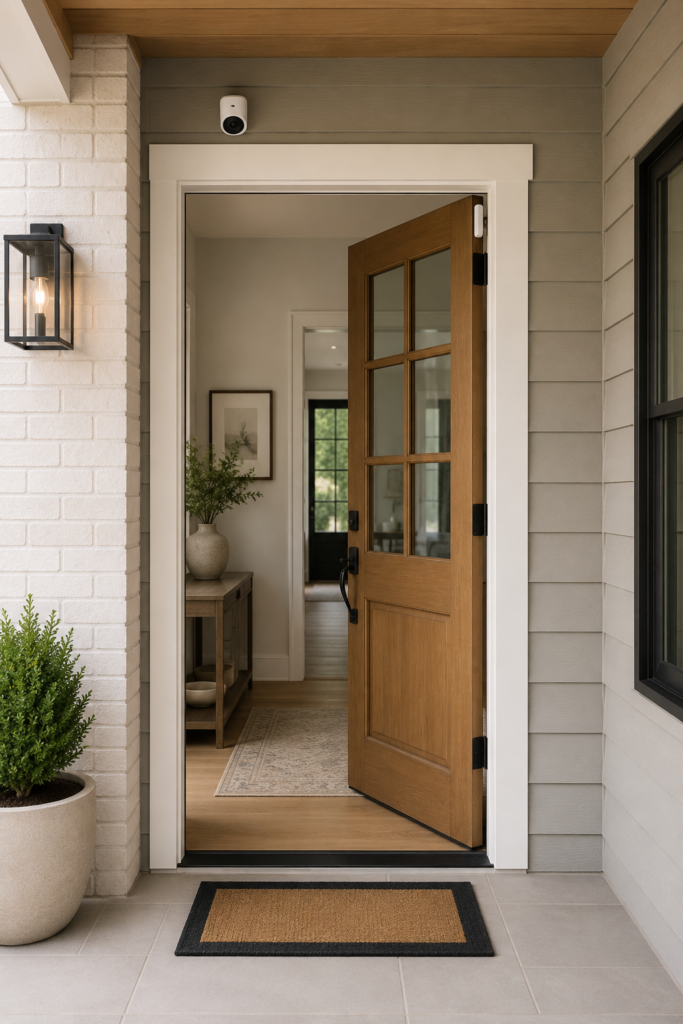
A DIY install is only as good as the placement behind it. A handful of guidelines cover most of what matters:
- Every ground-floor entry point gets a contact sensor — not just the front and back door. Sliding doors and easily-reached windows are common blind spots.
- Motion sensors belong in hallways and open living spaces, angled to catch movement between rooms rather than pointed at a single doorway.
- Outdoor cameras go at entry points, not just the front door. Side gates and back doors get broken into more often than people expect, precisely because they’re not covered. Our outdoor security camera guide breaks down which camera types fit which entry points.
- Avoid pointing cameras at public sidewalks or a neighbor’s windows. Beyond the privacy issue, it can violate local ordinances depending on where you live — keep the field of view on your own property.
- Skip mirrors, windows facing direct sunlight, and spots behind glass for indoor cameras — reflections and glare interfere with motion detection and night vision alike.
- Keep the base station central and away from thick walls or metal appliances, which can weaken the signal to sensors on the far side of the house.
- If Wi-Fi coverage is unreliable at a specific entry point, a camera that doesn’t depend on your home network is worth considering — our guide to security cameras without Wi-Fi covers options built for exactly that gap.
Common DIY Installation Mistakes
Most DIY security failures aren’t about the equipment — they’re about a handful of avoidable setup mistakes:
- Mounting sensors before testing the connection. Pair and confirm each device first, then commit to the adhesive. Repositioning a sensor after it’s stuck down usually damages the mount.
- Skipping the app notification settings. Default alert settings are often too aggressive or too quiet — spend five minutes tuning them so you’re not ignoring every push notification within a week.
- Forgetting cellular or battery backup. A system that only works over Wi-Fi goes dark the moment someone cuts your internet or the power goes out — exactly when you need it most.
- Placing the keypad somewhere visible from outside. If someone can see your arm/disarm code being entered through a window, you’ve defeated half the point of having a keypad at all.
- Never actually testing the system. Plenty of people install everything, arm the system, and never trigger a real test. Do it once, deliberately, so you’re not finding out it doesn’t work during an actual break-in.
- Using default app passwords or skipping two-factor authentication. A security system that’s easy for you to access remotely can be easy for someone else too — see our guide on securing your smart home from hacking for the setup steps worth doing once, right after your install.
Troubleshooting Common Installation Problems
| Problem | Likely Fix |
|---|---|
| Sensor won’t pair with the base station | Move the sensor closer to the base station during initial pairing, then relocate it to its permanent spot once paired. |
| Sensor falls off the door or window frame | Clean the surface with alcohol wipes and use a fresh adhesive strip — reused adhesive rarely holds. |
| App shows the device as “offline” | Check that the base station has a stable Wi-Fi connection first; most offline errors trace back to the hub, not the individual sensor. |
| Camera night vision looks washed out | Reposition away from direct light sources (streetlights, motion floodlights) that overwhelm the night vision sensor. |
| Frequent false alarms | Adjust motion sensitivity in the app and re-angle motion sensors away from HVAC vents, ceiling fans, and pet zones. |
| Keypad won’t accept your PIN | Confirm the system is fully armed/disarmed in the app before re-entering — some keypads briefly lock input during a state change. |
Best DIY Self-Install Security Systems (Quick Picks)
The step-by-step process above applies broadly across brands, but the specific hardware you choose still matters. Here’s a quick supporting look at four popular options — for full pricing breakdowns, monitoring tiers, and head-to-head comparisons, see our top-rated home security systems roundup and alarm system for house guide.
Ring Alarm
Ring Alarm’s setup follows the same base-station-plus-sensor pattern described above, guided entirely through the Ring app. It’s a natural fit if you’re already in the Amazon ecosystem, and starter kits are widely available. One thing worth knowing: since 2024, Ring’s free self-monitoring tier lost some functionality — recorded clips and person detection now require a paid Ring Protect plan.
SimpliSafe
SimpliSafe ships its sensors with pre-applied adhesive backing, which shortens the mounting step of the install process described above. No professional installation is required, though the company offers it as an option if you’d rather not do the setup yourself.
Wyze Home Monitoring
Wyze is DIY-only — there’s no professional install option at all, which keeps its equipment and monitoring pricing among the lowest in this category. The tradeoff is a thinner equipment lineup than Ring or SimpliSafe, so it suits a basic setup better than a large, sensor-heavy home.
Abode
Abode’s app-guided pairing process is built around the same core steps outlined above, with one notable advantage for smart home households: it’s currently the only major DIY system with native Apple HomeKit support, alongside Alexa, Google Home, Zigbee, and Z-Wave.
Final Installation Checklist
- ☐ Checked Wi-Fi signal strength at the planned base station location
- ☐ Downloaded the app and created an account before unboxing
- ☐ Walked the home and listed every entry point to cover
- ☐ Charged all battery-powered devices before mounting
- ☐ Placed the base station in a central, unobstructed location
- ☐ Paired every sensor and camera individually through the app
- ☐ Cleaned each mounting surface before applying adhesive
- ☐ Tested every door and window sensor by triggering it manually
- ☐ Adjusted motion sensitivity and notification settings
- ☐ Positioned the keypad out of view from outside windows
- ☐ Ran a full test with monitoring active, if subscribed
- ☐ Enabled two-factor authentication on the account
Frequently Asked Questions
How long does it take to install a home security system yourself?
For a small apartment with a basic kit, most people finish in 30-45 minutes. A full house with 8-14 sensors plus a couple of cameras usually takes 60-120 minutes. The pairing process itself is fast — the time goes into mounting sensors and testing each one.
Do I need any special tools to install a DIY security system?
No. Every system covered here uses adhesive-mounted sensors and plug-in base stations. A screwdriver is occasionally useful for cameras that offer an optional screw-mount for extra hold, but it’s never required.
Can I install a security system without drilling any holes?
Yes. Contact sensors, keypads, and most cameras in DIY kits ship with adhesive strips designed to hold on painted drywall, wood trim, and most door and window frames. Renters commonly complete an entire install with zero drilling.
What if I place a sensor wrong — can I move it after installation?
Yes, but the adhesive backing usually only holds well once. If you need to reposition a sensor, use a fresh adhesive strip rather than reusing the old one, which won’t hold as securely the second time.
Does installing a security system myself void the warranty?
No. DIY systems are designed and warrantied for self-installation — that’s the entire point of the product category. Warranty issues typically only arise from physical damage or opening sealed hardware components, not from mounting sensors yourself.
Can I install security cameras without Wi-Fi?
Most DIY alarm systems rely on Wi-Fi or a cellular connection for remote alerts, but standalone camera options exist that work without a home Wi-Fi network. See our guide to security cameras without Wi-Fi for options built for that scenario.
How do I know if my sensors are placed correctly?
Test every sensor before you arm the system. Open each sensored door and window and confirm the app registers the event in real time. If a sensor doesn’t trigger, it’s usually a placement or adhesive issue — reposition it closer to the frame’s contact point and retest.
Can I add more devices to my system after the initial install?
Yes. Every system in this guide is designed to expand — you can add sensors, cameras, and smart home devices later through the same app, without redoing your original setup. If you’re also adding entry-point hardware like smart locks, our guide to how smart locks work is a useful companion read.
The Bottom Line
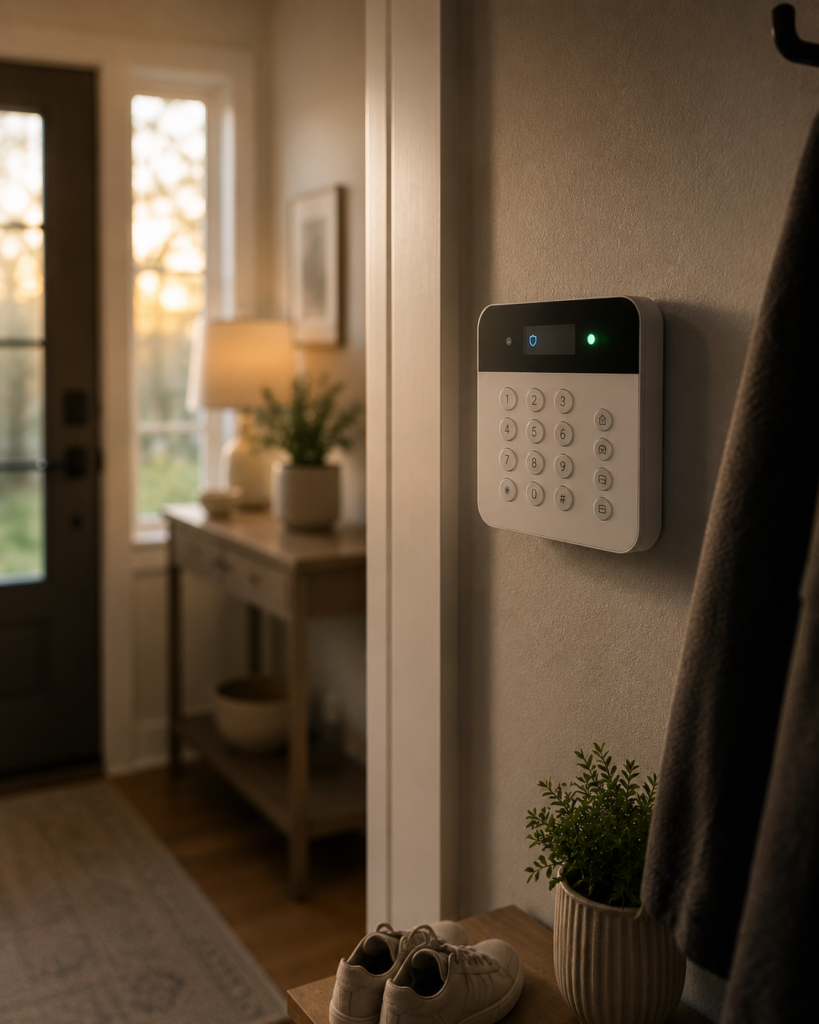
The idea that a “real” security system requires a technician and a contract is mostly a holdover from an era before wireless sensors and smartphone apps existed. The actual install — hub, sensors, cameras, testing — is straightforward enough that most people finish it in an afternoon, without ever picking up a drill.
Block out an hour this weekend, follow the placement guidelines above, and actually test the system before you trust it. That’s the whole job — no technician required.
Have you installed your own security system? Which one did you go with — and did the setup go as smoothly as advertised? Let us know in the comments.
You May Also Like
- Alarm System for House: The Honest Homeowner’s Guide (2026)
- Top Rated Home Security Systems Worth Buying in 2026
- Best Smart Locks for Apartments (2026): Renter-Friendly, No-Drill Options
- How to Secure Your Smart Home From Hacking
Affiliate Disclosure: This post may contain affiliate links. If you buy through one, we may earn a commission at no extra cost to you. This does not affect our opinions or recommendations — see our disclaimer for details.